We have compiled a list of manufacturers, distributors, product information, reference prices, and rankings for Inspection Systems.
ipros is IPROS GMS IPROS One of the largest technical database sites in Japan that collects information on.

Inspection Systems Product List and Ranking from 285 Manufacturers, Suppliers and Companies

Last Updated: Aggregation Period:Oct 29, 2025~Nov 25, 2025
This ranking is based on the number of page views on our site.

Inspection Systems Manufacturer, Suppliers and Company Rankings

Last Updated: Aggregation Period:Oct 29, 2025~Nov 25, 2025
This ranking is based on the number of page views on our site.

  1. エーディーディー Kyoto//software
  2. 山善 Osaka//Trading company/Wholesale
  3. サン情報サービス 東京支社 Tokyo//others
  4. 4 シリウスビジョン(旧ナビタスビジョン) Kanagawa//Testing, Analysis and Measurement
  5. 5 テクノス Tokyo//Industrial Machinery

Inspection Systems Product ranking

Last Updated: Aggregation Period:Oct 29, 2025~Nov 25, 2025
This ranking is based on the number of page views on our site.

  1. AI Image Inspection Device "EYEbeGenesis" 山善
  2. Solving the challenges faced by medical laboratory technicians and administrators in healthcare settings! Clinical testing system. サン情報サービス 東京支社
  3. [Case Study] One-Shot 3D Shape Measuring Instrument 'VR-3200' ブル精密 (株)ブル精密 本社
  4. 4 CT scanning system 'YXLON FF35 CT' Comet Technologies Japan K.K. Comet Yxlon
  5. 5 Clinical Testing System "ALCS" ONODERA Creative&Technology (旧 株式会社サイス) 第一ITソリューション事業本部

Inspection Systems Product List

601~615 item / All 675 items

Displayed results

High-performance 100% inspection machine series

Used by famous zipper manufacturers in Europe and America.

The "High-Performance 100% Inspection Machine Series" is a market-leading inspection system with the fastest speed. Thanks to its high-rigidity structure, it operates at high speed and with stability. An encoder is used on the turntable, ensuring that lightweight errors are "zero." Additionally, it supports IoT with Wi-Fi for fault diagnosis and countermeasures. Please feel free to contact us if you have any requests. 【Features】 ■ Versatility (addition of inspection modules, etc.) ■ Two-layer granite base structure ■ Siemens PLC + brushless DC motor ■ Improved reliability using two PCs (one for inspection and one for operation) ■ Glass table specification, linear feed specification *For more details, please download the PDF or feel free to contact us.

  • Inspection robot

Added to bookmarks

Bookmarks list

Bookmark has been removed

Bookmarks list

You can't add any more bookmarks

By registering as a member, you can increase the number of bookmarks you can save and organize them with labels.

Free membership registration

[Video] Multi-line system for foreign object inspection and weight inspection

Space-saving foreign matter and weight composite inspection! Contributes to improved yield with independent lanes!

We will demonstrate a compact X-ray and weight inspection combined multi-line inspection system that improves production efficiency. 【Benefits】 - By enabling combined inspection of foreign objects and weight without changing the work pitch, the line length is shortened, achieving space-saving. - Each lane can independently inspect, measure, and sort, significantly improving yield. You can view the video from the YouTube video URL/related links. If you are interested in the product, please feel free to download the catalog.

  • X-ray Inspection Machine

Added to bookmarks

Bookmarks list

Bookmark has been removed

Bookmarks list

You can't add any more bookmarks

By registering as a member, you can increase the number of bookmarks you can save and organize them with labels.

Free membership registration

POCT device collaboration system "eel up!"

Easy transmission of test results to the electronic medical record.

"eel up!" is a POCT device integration system that connects a compact testing device for in-hospital measurements with electronic medical records. ■ The electronic medical record integration system "eel," which has over 700 implementations nationwide, now appears as a POCT device integration system. ■ It supports various formats including MEDIS format, HL7, Rs-base, and CSV data formats. Additionally, the inspection result viewing application "e Inspection Notebook" is also available as a reporting option. We can respond quickly to enable operation within a short period. Please feel free to consult us for more details. 【Features】 ■ Connects up to five testing devices with a single PC ■ Offered at a lower cost than specimen testing systems ■ Sends test results to electronic medical records with simple operations ■ Extensive connection track record with electronic medical records and analysis devices ■ Simple design that is easy to use even in clinics *For more details, please download the PDF or feel free to contact us.

  • Software (middle, driver, security, etc.)
  • Other operation management software
  • Other information systems

Added to bookmarks

Bookmarks list

Bookmark has been removed

Bookmarks list

You can't add any more bookmarks

By registering as a member, you can increase the number of bookmarks you can save and organize them with labels.

Free membership registration

Diondo Industrial CT Measurement Services in Germany - Cultural Heritage and Archaeology

Provide new perspectives and methods for archaeological research.

In recent years, rapidly advancing digital technology has been widely utilized in archaeological research, cultural heritage preservation, and digital displays in museums. Using CT scans, a wealth of detailed information about the structure, materials, and lesions of cultural artifacts can be obtained. In early 2005, scientists conducted the first CT scan of the mummy of the Egyptian pharaoh (Tutankhamun) from 3,000 years ago, creating a complete digital image of the mysterious pharaoh and shedding light on the mystery of his death. Expert Eric Bruin conducted a CT scan of a thousand-year-old mummified Buddha statue at the World Museum in Rotterdam, Netherlands, revealing that the statue contained the complete remains of a monk. This is a very rare physical representation of a bodhisattva. Diondo's industrial CT detection system plays a significant role in the fields of cultural heritage and archaeology.

  • Contract Analysis
  • Contract measurement
  • Contract Inspection

Added to bookmarks

Bookmarks list

Bookmark has been removed

Bookmarks list

You can't add any more bookmarks

By registering as a member, you can increase the number of bookmarks you can save and organize them with labels.

Free membership registration

【Delivery Example】Eddy Current Inspection System

Automatically measure and detect surface cracks in products using eddy currents!

We would like to introduce a case study of the inspection equipment "Eddy Current Inspection System" that we manufactured. It is capable of detecting surface cracks that occur in products and conducting inspections in a non-destructive and non-contact manner. Depending on the specifications of the product inspection, it is possible to carry out the entire process from delivery, inspection, to discharge completely inline. 【Features】 ■ Detects surface cracks that occur in products ■ Capable of conducting inspections in a non-destructive and non-contact manner *For more details, please refer to the related links or feel free to contact us.

  • Flaw detection testing
  • Other inspection equipment and devices

Added to bookmarks

Bookmarks list

Bookmark has been removed

Bookmarks list

You can't add any more bookmarks

By registering as a member, you can increase the number of bookmarks you can save and organize them with labels.

Free membership registration

Introduction of AI-based rule-based automatic inspection system

Would you like to replace visual inspection with an AI and rule-based automatic inspection system?

In terms of visual inspection, there are challenges such as a shortage of inspectors, variability in quality, and the need for improved productivity. To address these challenges, we propose an automated inspection system. By training AI to learn the judgment criteria of visual inspectors, it can make assessments based on similar standards as humans. Additionally, using rule-based inspections allows for the automation of checks such as dimensional measurements, character recognition, and counting items. Both AI and rule-based systems maintain consistent judgment criteria even during prolonged inspections. Furthermore, they can perform inspections at a speed faster than humans, which can lead to increased productivity. At JTG, we listen to our customers' needs and provide proposals that include the optimal assessment methods. If you have challenges with visual inspection, please feel free to contact us.

  • Company:JTG
  • Price:Other
  • Visual Inspection Equipment

Added to bookmarks

Bookmarks list

Bookmark has been removed

Bookmarks list

You can't add any more bookmarks

By registering as a member, you can increase the number of bookmarks you can save and organize them with labels.

Free membership registration

JTG Lab

The first step towards automating visual inspections – Please consult us about imaging and AI verification –

At JTG Lab, we provide "imaging verification," which serves as the basis for decision-making in AI visual inspection automation, and "AI learning verification," which uses images to actually conduct AI training and verify whether the AI can learn the criteria for determining good or bad quality. Depending on your needs, we can also propose a complete set of equipment for fully automated or semi-automated solutions after these verifications. 【What JTG Lab Can Do】 ■ Imaging Verification We prepare various industrial cameras and lighting to verify whether it is possible to capture images of the products to be inspected and the defects to be detected. We check the imaging environment to ensure that the AI can easily learn and judge the products and defects we have discussed in advance. ■ AI Learning Verification By using images obtained from imaging verification or images that you already possess, we train the AI to learn the characteristics of normal and defective items, verifying whether it can make correct judgments. ■ Verification with Existing Equipment Typically, imaging verification is conducted on a desktop, but for some products, imaging can only be done within existing production lines. In such cases, we will install cameras and lighting in locations within the actual production line where imaging is possible to conduct the verification.

  • Company:JTG
  • Price:Other
  • Visual Inspection Equipment

Added to bookmarks

Bookmarks list

Bookmark has been removed

Bookmarks list

You can't add any more bookmarks

By registering as a member, you can increase the number of bookmarks you can save and organize them with labels.

Free membership registration

High-speed, non-contact, non-destructive optical inspection system for 3D object shapes.

Optical measurement, non-contact measurement, optical interference, OCT (Optical Coherence Tomography), ultra-fast optical control, high-speed laser, optical frequency comb applied measurement, optical fiber applied measurement.

In manufacturing production lines, it is essential to detect defects on the surfaces and coatings of all products to maintain quality and reliability. However, the reality is that existing measurement devices are not practical due to reasons such as slow inspection speeds or vulnerability to vibration environments. To overcome these challenges, our laboratory is conducting research and development on a device that enables non-contact and non-destructive three-dimensional shape measurement at high speed using light. For example, when scanning a space by projecting a two-dimensional tomographic image onto a two-dimensional camera in real time, completing the imaging in microseconds (one millionth of a second) allows for the clear capture of fine surface shapes of objects that are moving or vibrating quickly without blurring. This is called single-shot three-dimensional depth cross-sectional imaging and can be applied to inline total inspection. Furthermore, by advancing this technology, spectral information can be obtained for each position, structure, and layer. In other words, it is also possible to perform composition and material analysis for each structure that makes up the object.

  • others

Added to bookmarks

Bookmarks list

Bookmark has been removed

Bookmarks list

You can't add any more bookmarks

By registering as a member, you can increase the number of bookmarks you can save and organize them with labels.

Free membership registration

Automation of quality inspection! AI appearance inspection system 'Night Checker'

【Labor Shortage / Automation Support】Easily streamline the quality inspection of parts with fewer personnel! It is now possible to implement with reduced initial and running costs!

In recent years, the use of AI in appearance inspection systems has advanced, enabling the automation of complex discrimination and recognition compared to traditional methods. However, challenges such as "high costs," "long delivery times," and "difficulty in obtaining training data for AI models" exist when implementing these systems. The "Night Checker" may be able to solve such concerns. Developed by Tinet Japan, the "Night Checker" is an AI appearance inspection system that keeps implementation and running costs low. 【Features】 - Achieves low-cost and short delivery time implementation through a packaged configuration that includes basic functions in advance. - Utilizes 3DCG technology to create digital twin data that closely resembles the actual product. By using this for AI model training, it significantly reduces the training period. - Equipped with a foundation for integration with cameras, rejection devices, MES/ERP systems, etc., allowing for flexible system integration. *For more details, please refer to the materials. Feel free to contact us with any inquiries.

  • イプロス用画像データ2(560px)_01.jpg
  • イプロス用画像データ2(560px)-02(150ppi).jpg
  • イプロス用画像データ2(560px)-03.jpg
  • イプロス用画像データ2(560px)-04.jpg
  • イプロス用画像データ2(560px)-05.jpg
  • イプロス用画像データ2(560px)-06(150ppi).jpg
  • Visual Inspection Equipment

Added to bookmarks

Bookmarks list

Bookmark has been removed

Bookmarks list

You can't add any more bookmarks

By registering as a member, you can increase the number of bookmarks you can save and organize them with labels.

Free membership registration

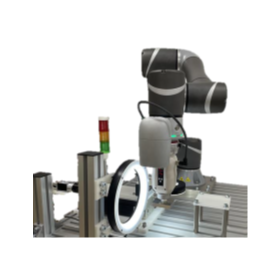
AI Visual Inspection System "Techman 360"

Immediate operation with a 100V power supply! Start automation easily and at low cost with teaching-less technology.

We would like to introduce our AI visual inspection system, "Techman 360." This system addresses issues in production sites such as the burden of visual inspections, variations in quality, and the lack of technicians capable of building AI visual inspection systems. Additionally, with the "Flying Trigger Inspection," it significantly reduces the cycle time by not stopping the robot's operation during inspections. With teaching-less functionality and ease of installation, it allows for the affordable introduction of automation equipment. 【Features】 ■ Easy labor-saving with teaching-less operation ■ Low-cost automation for a small start ■ Flying Trigger Inspection ■ Supports bulk picking *For more details, please download the PDF or feel free to contact us.

  • Visual Inspection Equipment
  • Inspection robot

Added to bookmarks

Bookmarks list

Bookmark has been removed

Bookmarks list

You can't add any more bookmarks

By registering as a member, you can increase the number of bookmarks you can save and organize them with labels.

Free membership registration

Tablet/Capsule Appearance Inspection System 'T/CVIS-NS Series'

Switching is possible in just 5 minutes! Achieve clear image inspection with a color camera.

The "T/CVIS-NS Series" is a tablet/capsule appearance inspection system that can perform two ultra-fast and highly accurate inspections in a short switching time. The switch between tablets and capsules is done only with the lighting unit and transport components. It can be switched in just 5 minutes. With the incorporation of high-precision 3D and color inspection that achieves a processing capacity of up to 600,000 tablets per hour, it faithfully reproduces the surface shape of tablets and realizes highly accurate shape inspections. 【Features】 ■ Achieves overwhelming speed with a simple structure of the rectifying section ■ Eliminates individual differences in product switching tasks, reducing work time by approximately 30% compared to our previous models ■ Improved ease of attachment and detachment, and cleaning of the system through modular unitization ■ Equipped with V-IPU image processing unit ■ Incorporates high-precision 3D and color inspection that achieves a processing capacity of up to 600,000 tablets per hour *For more details, please refer to the PDF document or feel free to contact us.

  • Image Processing Equipment
  • Visual Inspection Equipment

Added to bookmarks

Bookmarks list

Bookmark has been removed

Bookmarks list

You can't add any more bookmarks

By registering as a member, you can increase the number of bookmarks you can save and organize them with labels.

Free membership registration

100 Million Pixels: Phase One Camera Case Study - Overseas and Transmission Towers Edition

Ensuring safety and taking photos from a distance of about 10-15 meters! Introducing examples where clear photos were obtained!

We would like to introduce examples of the overseas use of a high-resolution 100-megapixel camera developed for drone mounting. The camera used is the 100-megapixel camera "iXM-100," which can be mounted on drones. Even when shooting from above using a drone, we were able to adjust the shutter speed and capture clear photos. Additionally, with a fast shutter speed (in this case, 1/1600), we were able to take blur-free shots even during unstable flight. 【Shooting Environment】 ■ Location: Overseas, Denmark, high-voltage transmission tower ■ Shooting Environment: Aerial photography from a drone, ensuring safety while shooting from a distance of about 10-15m ■ Drone: DJI Matrice 300 ■ Camera: Phase One iXM-100 100-megapixel camera ■ Camera Settings: Aperture f/8, ISO and shutter speed vary for each photo ■ Lens Used: 80mm AF (autofocus) lens (equivalent to about 63mm on a 35mm sensor) *For more details, please refer to the PDF document or feel free to contact us.

  • PhaseOne_P3_DJI.jpg
  • a876_1.jpg
  • a876_3.jpg
  • a876_4.jpg
  • High Speed Camera

Added to bookmarks

Bookmarks list

Bookmark has been removed

Bookmarks list

You can't add any more bookmarks

By registering as a member, you can increase the number of bookmarks you can save and organize them with labels.

Free membership registration

AI Visual Inspection System KE-VJM-AI Series

It is an AI visual inspection system equipped with AI software that is expected to achieve learning effects through deep learning.

This is an advanced appearance inspection system equipped with the optimal AI software from deep learning-based image analysis software designed for machine vision. Traditionally, inspections that were too complex or labor-intensive and conducted through human visual inspection can now be performed using this system, which offers an unprecedentedly effective inspection by merging machine vision and human vision. 【Equipped with Comprehensive Features】 This is a model of the defect inspection system 'KE-VJM Series' that incorporates deep learning capabilities. ● Fusion of PC-based machine vision and image processing unit ● Advanced imaging and filtering technology of the image processing unit ● Equipped with a large 22-inch display ● Inspection screens can be displayed in both vertical and horizontal orientations ● Defect detection images are displayed in real-time ● Location information of defects is displayed on a map ● Inspection data can be printed in three different patterns

  • Defect Inspection Equipment
  • Visual Inspection Equipment
  • Image Processing Equipment

Added to bookmarks

Bookmarks list

Bookmark has been removed

Bookmarks list

You can't add any more bookmarks

By registering as a member, you can increase the number of bookmarks you can save and organize them with labels.

Free membership registration

Explained with examples! Challenges and limitations of visual inspection systems.

If you are struggling to meet the demands for advanced inspections, please take a look!

- Background and Challenges of Visual Inspection We summarize the current state of the image processing system market, which is expected to grow, as well as the benefits of automating visual inspections and the challenges faced during and after the introduction of inspection equipment. - Challenges in Pattern Inspection of Miniaturized Electronic Circuit Boards We will introduce our uniquely developed inspection method for pattern defects in electronic circuit boards that are becoming increasingly complex and miniaturized, making detection difficult. - Challenges in Automating Visual Inspections Requiring Multiple Optical Conditions In inspections where various defect detections are necessary for the target object, there are cases that utilize multiple lighting conditions. We will introduce inspection techniques using the latest lighting equipment. - Introduction to Image Processing Inspection URCP Image Processing Inspection URCP supports the optimization of image processing inspections from both hardware and software perspectives. We provide an all-in-one image processing inspection system tailored to our customers' needs. 1. In-house developed software (customization is also possible) 2. Selection of optical conditions and equipment tailored to various defects 3. Design, assembly, and delivery of inspection equipment according to specifications

  • others

Added to bookmarks

Bookmarks list

Bookmark has been removed

Bookmarks list

You can't add any more bookmarks

By registering as a member, you can increase the number of bookmarks you can save and organize them with labels.

Free membership registration

Easy, low-cost, high-performance "Cameo NC Checker for Lathes"

With this one device, you can check, modify, and communicate NC data.

By visualizing and confirming NC data in advance, you can prevent machining errors. - Thoroughly check the status of NC data - Coordinate values of machining paths can be displayed - The stopping position of the drawing is completely flexible - Basic errors are automatically checked - Errors can be corrected immediately - Compatible with various manufacturers - Data can be communicated to machine tools - A free trial version is available (http://camest.com/trial/index.html) - Videos are currently available *Software for Windows XP, Windows Vista, Windows 7, Windows 8, Windows 8.1 *Standard built-in serial port and dedicated RS-232C communication cable are required separately for communication.

  • 2D CAM
  • lathe
  • Metal bearings

Added to bookmarks

Bookmarks list

Bookmark has been removed

Bookmarks list

You can't add any more bookmarks

By registering as a member, you can increase the number of bookmarks you can save and organize them with labels.

Free membership registration