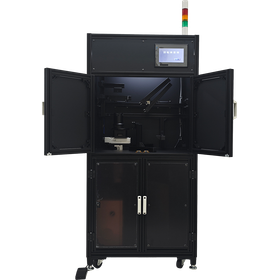
We have compiled a list of manufacturers, distributors, product information, reference prices, and rankings for Visual Inspection System.
ipros is IPROS GMS IPROS One of the largest technical database sites in Japan that collects information on.

Visual Inspection System Product List and Ranking from 36 Manufacturers, Suppliers and Companies

Last Updated: Aggregation Period:Oct 15, 2025~Nov 11, 2025
This ranking is based on the number of page views on our site.

Visual Inspection System Manufacturer, Suppliers and Company Rankings

Last Updated: Aggregation Period:Oct 15, 2025~Nov 11, 2025
This ranking is based on the number of page views on our site.

  1. エーディーディー Kyoto//software
  2. テクノス Tokyo//Industrial Machinery
  3. フロンティアシステム Shiga//Testing, Analysis and Measurement
  4. 4 スカイロジック Shizuoka//software
  5. 5 ティーネットジャパン (製造DX支援事業) Tokyo//IT/Telecommunications

Visual Inspection System Product ranking

Last Updated: Aggregation Period:Oct 15, 2025~Nov 11, 2025
This ranking is based on the number of page views on our site.

  1. Automation of quality inspection! AI appearance inspection system 'Night Checker' ティーネットジャパン (製造DX支援事業)
  2. Case Study of Automated Visual Inspection: Inspection Example for Checking the Irregularities and Warping of Metal Sheets エーディーディー
  3. A system for inspecting films and paper that are transported at high speed in a roll-to-roll manner. エーディーディー
  4. Collaborative Robot AI Appearance Inspection Automation System Techman 360 横山商会 名古屋営業所
  5. 5 Automated inspection system, appearance inspection system オレンジテクノロジーズ

Visual Inspection System Product List

16~30 item / All 101 items

Displayed results

【Reliable support from consideration to implementation】For those struggling with image processing visual inspection systems.

I want to automate visual inspections, but I'm worried whether it can accommodate my company's products. 'iVision' will support you all the way to implementation. [Case study available]

Do you have any of these concerns? - Are you worried that your company's products can be automatically inspected? - Is the installation environment limited, making implementation difficult? - Are there many technical terms, making it hard to understand what needs to be checked? - Is it difficult to secure personnel for initial setup? The image processing visual inspection system "iVision" can solve these problems! The image processing visual inspection system "iVision," developed by our company, is a product we highly recommend for those who are anxious about automating visual inspections. "iVision" is built with hardware and software that allows imaging in a verified environment prior to implementation, and we deliver it in the form desired by the customer. Additionally, our staff will perform the initial setup upon delivery and will assist until it operates correctly. 【Features】 - We build an imaging environment that reliably detects defects through prior verification! - We offer full customization according to the customer's wishes, from fully automated devices to inline solutions! - With on-site adjustments by our staff at the time of delivery, no customer setup is required! - We also provide remote support for any issues after delivery!

  • 方法.jpg
  • 8ec53859643de84f3c7e6dd738cf0c16.png
  • 装置.jpg
  • 装置2.jpg
  • Image Processing Software

Added to bookmarks

Bookmarks list

Bookmark has been removed

Bookmarks list

You can't add any more bookmarks

By registering as a member, you can increase the number of bookmarks you can save and organize them with labels.

Free membership registration

Case study of automated visual inspection: *Automated inspection case of fine defects on metal surfaces*

A case of automated visual inspection using XY operating robots to continuously inspect fine defects occurring on the surfaces of metals and glass.

Would you like to switch from "visual inspection" to "automated inspection using a camera" for the appearance inspection of fine defects on metal and glass surfaces? We would like to introduce a practical example of the "iVision Robot," which installs a camera on a general-purpose XY stage moving device to sequentially move to specified locations and conduct inspections. By using a two-dimensional operating stage, it becomes possible to sequentially inspect specified locations and confirm where and what kind of defects were present. When conducting repeated inspections using a magnifying glass, there may be areas that are not inspected, leading to oversight. However, since this system operates automatically, it can avoid that issue. 【Features of this system】 ■ By using a two-dimensional operating stage, it is possible to inspect wide areas sequentially. ■ By moving automatically, it can thoroughly inspect the target area even for detailed inspections. ■ It indicates the coordinates of defects and displays a map showing where and what kind of defects were found. ■ The device can be modified based on the inspection content. First, we will verify whether the work you wish to inspect is feasible. *Detailed processing information and flow are provided in the PDF.

  • Image Processing Software

Added to bookmarks

Bookmarks list

Bookmark has been removed

Bookmarks list

You can't add any more bookmarks

By registering as a member, you can increase the number of bookmarks you can save and organize them with labels.

Free membership registration

Case study of automated visual inspection: Inspection case for checking the surface condition of metal parts.

An example of the automation of visual inspection using a camera that automatically operates to adjust each surface of metal parts with step differences and conducts inspections in sequence.

Shall we switch the visual inspection of metal parts with height differences from "manual measurement" to "automated inspection using a camera"? We will introduce a practical example of the "iVision Robot," which enables dimensional measurement by installing a camera on a general-purpose XYZ stage moving device. By using a three-dimensional operating stage, the camera can be moved to the appropriate position for inspection at varying heights, allowing for sequential inspection of necessary areas and enabling the overall condition of parts with height differences to be confirmed. 【Features of this system】 - By having the camera and stage operate at multiple locations that cannot be captured in a single image, necessary areas can be sequentially imaged and inspected. - Inspection can be performed on parts with height differences, which are difficult to focus on with a fixed camera, by allowing the camera to operate in the Z-axis direction. - A map is displayed showing where and what types of defects were found. - The device can be modified based on the inspection requirements. *First, we will verify whether the workpieces you wish to inspect can be accommodated. *Detailed processing information and flow are provided in the PDF.

  • Image Processing Software

Added to bookmarks

Bookmarks list

Bookmark has been removed

Bookmarks list

You can't add any more bookmarks

By registering as a member, you can increase the number of bookmarks you can save and organize them with labels.

Free membership registration

Case study of automated visual inspection: Inspection case for checking the welding condition of components.

A case study of automating visual inspection by installing a 3D sensor on a scara robot to check the welding condition of components on a metal plate!

Would you like to switch from "visual inspection" to "automated inspection using a 3D sensor" for confirming whether the components are accurately welded? We will introduce an inspection device that uses a SCARA robot on a fixed inspection stand to check the welding condition on metal plates. By operating the 3D sensor, it becomes possible to sequentially confirm the welding condition of the components attached to the metal plate. 【Features of this system】 - The SCARA robot can operate the 3D sensor even on metal plates of considerable length, allowing for inspection of the entire surface of the metal plate. - By using a 3D sensor, it is possible to confirm the three-dimensional state of the weld, which is difficult to inspect with a camera. - By registering the standard size for welding, it is possible to quickly determine OK or NG. - The device can be modified according to the inspection requirements. *First, we will verify whether the workpieces you wish to inspect can be accommodated. *Detailed processing information and flow are provided in the PDF.

  • Image Processing Software

Added to bookmarks

Bookmarks list

Bookmark has been removed

Bookmarks list

You can't add any more bookmarks

By registering as a member, you can increase the number of bookmarks you can save and organize them with labels.

Free membership registration

Case Study of Automated Visual Inspection: Example of Printed Content Inspection on Packaging Boxes

An example of the introduction of automatic inspection on the conveyor line for reading and verifying the accuracy of text printed on the surface of packaging bags for agricultural products and various materials!

Would you like to switch the printing inspection of text on the surface of packaging bags for agricultural products and various materials from "visual inspection" to "automated inspection using cameras"? We would like to introduce examples where cameras and lighting have been installed on existing conveyor lines and are being operated as an inspection system. Reading printed text on the surfaces of hard materials such as cardboard boxes and plastic containers can be handled by a relatively large number of inspection devices. However, for materials like burlap and paper bags, where the surface is not flat, printing irregularities can easily occur, and automatic recognition may fail to read the text. Our system can accurately read text according to various text conditions. 【Features of this system】 ■ Inspection can be performed on the conveyor line ■ Confirmation of printed content and reading of barcodes are possible ■ Text printed on uneven surfaces can also be read ■ Inspection locations can be changed based on inspection content *First, we will verify whether the work you wish to inspect is feasible. *Detailed processing information and flow are provided in the PDF.

  • Image Processing Software

Added to bookmarks

Bookmarks list

Bookmark has been removed

Bookmarks list

You can't add any more bookmarks

By registering as a member, you can increase the number of bookmarks you can save and organize them with labels.

Free membership registration

We will perform extraction of IC chips arranged on the tray, check for different varieties, and determine their orientation.

We will conduct a quantity inspection of devices such as IC chips arranged on a tray and perform a series of tasks up to printing the label seal at the time of sealing.

The specifications of trays vary, making it labor-intensive to confirm quantities and check for contamination with different varieties!! We conduct quantity confirmation and checks for contamination with different varieties and orientation of devices such as IC chips arranged in various standard trays. If there are no issues, we introduce a system that prints labels to be affixed during sealing at the same time【Instruction manual available】. ADDI Co., Ltd. has been able to accommodate a wide range of customer needs through years of expertise in developing inspection equipment. Additionally, our know-how allows us to provide delivery solutions tailored to customer requests. "Our company's work style is difficult to automate," "We have requested support from various companies in the past, but were turned down." The image processing visual inspection system "iVision" solves these problems! *For details, please download the catalog in PDF format. First, we confirm with our customers "what" and "in what condition" they want to conduct inspections, then we consider appropriate cameras and lighting, and based on that, we propose the necessary inspection equipment.

  • Image Processing Software

Added to bookmarks

Bookmarks list

Bookmark has been removed

Bookmarks list

You can't add any more bookmarks

By registering as a member, you can increase the number of bookmarks you can save and organize them with labels.

Free membership registration

【AI画像検査事例】金属加工品を識別

金属加工品の穴の有無や位置の違いを検出し、見た目の似通った異品を判定します!

次のような内容がホームページのお問合せフォームに届きました。 『金属加工物の識別を行いたいです(10cm程度の円板状加工物に、内部円周状に加工後が有るものと、無い物)カメラのリアル撮影時に、物体Aと物体Bを識別したいのですが、正確に同じ位置には設置できない状況です。 撮影には1秒程度停止を持てるのですが、このような条件で製品検査が可能でしょうか? 使用環境は加工機がある、工場内です。』 【検査設定と検査結果】 EasyInspectorの「マスター画像との比較」機能を使用することにより1カ所の穴の有無や位置の違いを検出し、見た目の似通った類似品(異品)を1秒未満で判定することができました。 左の画像はマスター画像(設定画面)桃色の線で検査部分を指定しています。 使用ソフト:EasyInspector 現行『EasyInspector2』colorパッケージ【マスター画像との比較】で検査できます。

  • Image Processing Software

Added to bookmarks

Bookmarks list

Bookmark has been removed

Bookmarks list

You can't add any more bookmarks

By registering as a member, you can increase the number of bookmarks you can save and organize them with labels.

Free membership registration

[AI Image Inspection Case] Presence or Absence Inspection of Parts

We will determine the presence or absence of plastic parts balls!

We have received many inquiries from industrial equipment manufacturers regarding various case studies. This time, we attempted to set up a test to determine the presence or absence of plastic parts (balls). The cases introduced on this site are for simple verification. We prepare lighting, cameras, lenses, etc., to test whether we can detect the defects we want to see. Typically, we request about two types of samples and detection targets. Since simple verification is a task to confirm the feasibility of detection, quantitative evaluations such as detection accuracy using a large number of samples and the correlation between image resolution and detection accuracy are generally not included. [Inspection Setup and Results] We conducted an inspection of the presence or absence of parts (balls) using the samples you provided. By using ring lighting to make the balls appear black, we were able to determine the presence or absence of the five parts in 0.14 seconds using EasyInspector's "specified color presence check" function.

  • Image Processing Software

Added to bookmarks

Bookmarks list

Bookmark has been removed

Bookmarks list

You can't add any more bookmarks

By registering as a member, you can increase the number of bookmarks you can save and organize them with labels.

Free membership registration

[AI Image Inspection Case] Inspection of Presence or Absence of Parts in a Bag

We will inspect the bag containing eight types of stationery and make a judgment!

We received a request for a free evaluation from an industrial machinery manufacturer to check if there are any omissions in the stationery set packed in the bag. We will inspect whether there are eight types of stationery inside the bag. Although this time it was stationery, this is an example of an application that can be used in various industries, such as checking if assembly parts are complete or if the instruction manual is included. 【Inspection Settings and Results】 Detection was possible as long as the characteristic parts of the work were not hidden. However, there were cases where detection was not possible if the bag was directly under the reflection, so it is stable to place it under the camera with as few wrinkles in the bag as possible. We were able to distinguish the eight types of work that should be inside the bag effectively. The image shows the inspection screen displaying the judgment result table. In the right image, the missing "instruction manual," labeled "B," is highlighted in red.

  • Image Processing Software

Added to bookmarks

Bookmarks list

Bookmark has been removed

Bookmarks list

You can't add any more bookmarks

By registering as a member, you can increase the number of bookmarks you can save and organize them with labels.

Free membership registration

[AI Image Inspection Case] Inspection of Knots and Roughness on Kamaboko Boards

This is a judgment for inspecting defects such as knots and roughness on the surface when cutting the kamaboko board.

During the inspection stage of wood cutting, you were considering cutting a board measuring 2m in length and a certain width from 5mm to 160mm while avoiding defective parts and cutting at the right timing. 【Inspection Settings and Results】 For knots, we used the "Color Comparison Inspection / Presence or Absence of Specified Color" function of EasyInspector. The specified color was set to the color of the knots. An inspection frame the size of one kamaboko board was set from the edge of the board, and this area was divided into four parts for the presence or absence color inspection. To capture the roughness of the board, we dimmed the indoor lighting and illuminated it from an angle, which allowed us to detect the roughness. The inspection item was "Scratch Inspection." No alignment correction was applied for the inspection of the flowing boards.

  • Image Processing Software

Added to bookmarks

Bookmarks list

Bookmark has been removed

Bookmarks list

You can't add any more bookmarks

By registering as a member, you can increase the number of bookmarks you can save and organize them with labels.

Free membership registration

[Case Study] Automation and labor reduction in AI visual inspection of large products such as cardboard boxes.

Instant judgment with image data! It is possible to reduce human errors that occurred due to human judgment.

Visual inspection of products over 1 meter, such as cardboard, tires, and wheels, poses challenges due to the large size of the products, requiring a spacious inspection area. Additionally, since inspectors conduct the inspection visually, the work time is significantly prolonged. Acuité's "AI Visual Inspection" can reduce inspection time and errors with a high detection rate. It also serves as an effective solution when the inspection area is narrow or when there is a desire to reduce the current inspection space. [Challenges and Requests Before Implementation] - The large size of the products necessitates a spacious inspection area. - The inspection process is lengthy because inspectors perform it visually. *For more details, please refer to the PDF document or feel free to contact us.*

  • Visual Inspection Equipment

Added to bookmarks

Bookmarks list

Bookmark has been removed

Bookmarks list

You can't add any more bookmarks

By registering as a member, you can increase the number of bookmarks you can save and organize them with labels.

Free membership registration

High-performance appearance inspection system

A high-performance HALCON library is available! You can choose according to your specifications.

We would like to introduce our "High-Performance Appearance Inspection System." With HALCON-based image processing, you can create flows using drag-and-drop, allowing the use of the advanced HALCON library without any programming knowledge. Additionally, it can detect edge defects and scratches below 1μm (at 20X magnification) and perform edge inspections for chipping and overflow from any virtual line. 【Features】 ■ High-speed acquisition of deep images even when using high-magnification lenses ■ Plane correction can be performed on inclined workpieces ■ Detection of edge defects and scratches below 1μm is possible ■ Edge inspections for chipping and overflow from any virtual line can be conducted ■ Flow creation using drag-and-drop for HALCON-based image processing is possible *For more details, please refer to the related links or feel free to contact us.

  • Visual Inspection Equipment

Added to bookmarks

Bookmarks list

Bookmark has been removed

Bookmarks list

You can't add any more bookmarks

By registering as a member, you can increase the number of bookmarks you can save and organize them with labels.

Free membership registration

AI Appearance Inspection Execution System [Webinar Information]

We will introduce the differences and advantages of deep learning compared to existing image processing, as well as the differences between general deep learning and our proposal at Ryowa!

Ryowa Co., Ltd. aims to achieve "easier," "any project," and "the last bastion of image processing" in visual inspection. Additionally, we are conducting "AI Visual Inspection Demo Webinars" tailored to your preferred schedule. Without joint participation from other companies, up to 100 participants from a single company can join. Although it is not yet publicly available, we plan to reveal some of the latest features in this webinar. *The tool will be either TEAM or Google Meet. 【Agenda】 1. Company Introduction 2. Differences between Existing Image Processing and AI Image Processing 3. Introduction of Deep Learning Products 4. Explanation of Judgment Method Tools 5. Deep Learning VS Existing Image Processing 6. Case Studies 7. Types of Licenses 8. Differences from Other Companies' Deep Learning 9. Introduction of Upcoming New Products 10. Q&A AI image processing will overcome projects that you had given up on in visual inspection! If you are interested in the webinar, please refer to the PDF materials and feel free to contact us.

  • Image Processing Equipment
  • Visual Inspection Equipment

Added to bookmarks

Bookmarks list

Bookmark has been removed

Bookmarks list

You can't add any more bookmarks

By registering as a member, you can increase the number of bookmarks you can save and organize them with labels.

Free membership registration

Image Processing and Appearance Inspection "Problem-Solving Solutions Document"

MV Mate, specialized in image inspection, addresses various issues!

Our company is not a device manufacturer, so we can only assist with the image inspection part. This is a document that explains concerns related to image processing and visual inspection, along with their solutions. If you have any issues regarding image inspection, please feel free to consult with us. 【Contents and Common Concerns】 ■ I want to automate visual inspection, but I don't know how to do it... ■ I once asked another company for an inspection device, but they declined, saying it was too difficult... ■ The judgment of the existing image inspection device is not stable... *For more details, please refer to the PDF document or feel free to contact us.

  • Other image-related equipment
  • Visual Inspection Equipment
  • Other inspection equipment and devices

Added to bookmarks

Bookmarks list

Bookmark has been removed

Bookmarks list

You can't add any more bookmarks

By registering as a member, you can increase the number of bookmarks you can save and organize them with labels.

Free membership registration

Kyushu Technology Co., Ltd. Sensing Business

We conduct visual inspections using general-purpose machines, as well as 2D picking and 3D picking.

We would like to introduce the sensing business of Kyushu Technology Co., Ltd. In this business, we conduct appearance inspections using general-purpose machines, as well as 2D and 3D picking. We have ample experience in setting up general-purpose imaging equipment from manufacturers such as KEYENCE, OMRON, COGNEX, and Mitsubishi Electric, and we automate various defect inspections and character recognition. Please feel free to consult us when you need our services. 【Business Content】 ■ Inspection using the humanoid appearance inspection system "GaiKan Kenta-kun" ■ Appearance inspection using general-purpose machines ■ 2D picking and 3D picking *For more details, please refer to the PDF materials or feel free to contact us.

  • Contract Inspection
  • Other contract services

Added to bookmarks

Bookmarks list

Bookmark has been removed

Bookmarks list

You can't add any more bookmarks

By registering as a member, you can increase the number of bookmarks you can save and organize them with labels.

Free membership registration