We have compiled a list of manufacturers, distributors, product information, reference prices, and rankings for measurement.
ipros is IPROS GMS IPROS One of the largest technical database sites in Japan that collects information on.

measurement Product List and Ranking from 95 Manufacturers, Suppliers and Companies

Last Updated: Aggregation Period:Dec 17, 2025~Jan 13, 2026
This ranking is based on the number of page views on our site.

measurement Manufacturer, Suppliers and Company Rankings

Last Updated: Aggregation Period:Dec 17, 2025~Jan 13, 2026
This ranking is based on the number of page views on our site.

  1. システムプラス 本社 Kanagawa//Industrial Electrical Equipment
  2. トヨタ自動車 エナジーソリューション事業部 Aichi//Energy
  3. ジャパンコントロールス 「Japan Controls Co. Ltd.」 東京本社 Tokyo//Trading company/Wholesale
  4. 4 因幡電機産業 産機カンパニー Osaka//Trading company/Wholesale
  5. 5 クレアクト Tokyo//Trading company/Wholesale

measurement Product ranking

Last Updated: Aggregation Period:Dec 17, 2025~Jan 13, 2026
This ranking is based on the number of page views on our site.

  1. Measure the heat generation and heat dissipation behavior of the IC chip in the circuit with high responsiveness using a thermal flow sensor! トヨタ自動車 エナジーソリューション事業部
  2. Scanning Laser Doppler Vibrometer *Non-contact vibration measurement システムプラス 本社
  3. R32 New Refrigerant Viscosity Measurement (For Process Control) Comprehensive Catalog ジャパンコントロールス 「Japan Controls Co. Ltd.」 東京本社
  4. 4 Wearable biological signal measurement "biosignals plux" クレアクト
  5. 4 Ultra-high precision 3D measurement "Gocator 4000/5000 Series" 因幡電機産業 産機カンパニー

measurement Product List

151~165 item / All 172 items

Displayed results

Electrical equipment contributing to the longevity of facilities - Non-destructive testing inspection.

Is the electrical equipment really okay with just insulation resistance testing and visual inspection? A new approach to equipment maintenance that allows inspection while live!

There are many consultations regarding incidents where contact resistance due to heat generation from distribution switchgear, low-voltage equipment, and cable connections can lead to fire risks and equipment failures. In general, many factories only conduct inspections that end with "insulation resistance measurement" or "visual inspection" as part of the statutory inspections. The "Electrical Equipment Thermographic Measurement" by Dōryokusha, a professional diagnostic group specializing in electrical equipment infrared surveys, can prevent accidents such as temporary shutdowns and fires by inspecting while the equipment is live. This non-destructive inspection service not only assesses the condition of the equipment but also allows for understanding the lifespan and trends of the equipment. Currently, some factories are using thermal labels and heat detection labels, but many do not have them installed in critical areas, resulting in a lack of overall understanding of the equipment's condition. We are currently accepting free diagnostics. *For more details, please refer to the PDF document or feel free to contact us. *If you wish to request a free diagnosis, please indicate "Request for Free Diagnosis" in your inquiry.

  • Contract measurement
  • Thermography
  • Other measurement, recording and measuring instruments

Added to bookmarks

Bookmarks list

Bookmark has been removed

Bookmarks list

You can't add any more bookmarks

By registering as a member, you can increase the number of bookmarks you can save and organize them with labels.

Free membership registration

For measuring water levels in tunnels and underground! Battery-operated cloud water level gauge (NETIS)

Up to 5 years of operation on battery; high-frequency measurements as short as once every minute.

This product features long-term operation on dry batteries while maintaining a high-frequency measurement cycle, enabling remote real-time monitoring and immediate alerts in case of abnormalities. It can also be linked with battery-operated cloud cameras. ■ Features - Long-term operation of up to 5 years on batteries - High-frequency measurements once every minute (measured data is continuously uploaded to the cloud) - Measurement range of up to 20 km (including underground and in tunnels) - Can connect to over 100 sensors ■ Amazing Points - No power supply needed on-site - Simply install the device and turn on the switch to automatically start measuring, recording, and monitoring - Immediate alerts in case of abnormalities - Remote real-time monitoring and the ability to change various settings such as thresholds and measurement cycles ■ Benefits - Cost reduction for power supply installation - Cost reduction for equipment installation - Reduction of labor for measurement, recording, and monitoring ■ Applications - Monitoring water levels during flooding - Monitoring drainage conditions - Observing water level distribution and fluctuations This system is available for sale, rental, and double rental. *For more details, please refer to the PDF document or feel free to contact us.

  • Other measurement, recording and measuring instruments

Added to bookmarks

Bookmarks list

Bookmark has been removed

Bookmarks list

You can't add any more bookmarks

By registering as a member, you can increase the number of bookmarks you can save and organize them with labels.

Free membership registration

For measuring water levels in boreholes! Battery-operated cloud-based water level meter (NETIS)

Up to 5 years of operation on battery, with high-frequency measurements as short as once every minute.

This product features long-term operation on dry batteries while maintaining a high-frequency measurement cycle, enabling remote real-time monitoring and immediate alerts in case of abnormalities. It can also be linked with battery-operated cloud cameras. ■ Features - Long-term operation for up to 5 years on batteries - High-frequency measurements once every minute (measured data is continuously uploaded to the cloud) - Measurement range of up to 20 km (including underground and in tunnels) - Can connect to over 100 sensors ■ Amazing Aspects - No power supply needed on-site - Simply install the device and turn on the switch to automatically start measurement, recording, and monitoring - Immediate alerts in case of abnormalities - Remote real-time monitoring and various setting changes such as thresholds and measurement cycles are possible ■ Benefits - Cost reduction for power supply installation - Cost reduction for equipment installation - Reduction of labor for measurement, recording, and monitoring ■ Possible Applications - Water level monitoring during flooding - Monitoring drainage conditions - Observation of water level distribution and fluctuations This system is available for sale, rental, and double rental. *For more details, please refer to the PDF document or feel free to contact us.

  • Other measurement, recording and measuring instruments

Added to bookmarks

Bookmarks list

Bookmark has been removed

Bookmarks list

You can't add any more bookmarks

By registering as a member, you can increase the number of bookmarks you can save and organize them with labels.

Free membership registration

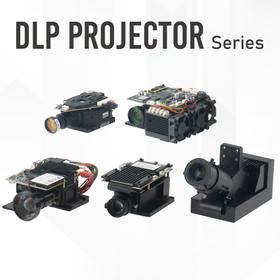
Industrial Projector for Electronic Devices | Structured Light Patterns and 3D Measurement

Industrial DLP projectors that achieve high-precision 3D inspection.

In the electronic equipment industry, circuit board inspection requires high-precision testing to ensure product quality and reliability. It is particularly important to accurately detect the mounting condition of fine components and soldering defects. Traditional inspection methods have limitations in detection accuracy and inspection speed, making efficient inspection challenging. The DLP projector [OPR series] addresses these issues by enabling high-precision 3D inspection. [Application Scenarios] - Inspection of circuit board mounting conditions - Detection of soldering defects - Inspection of component defects [Benefits of Implementation] - Quality improvement through high-precision inspection - Reduction in inspection time - Cost savings through early detection of defective products

  • OPR305-single.png
  • OPR405-single.png
  • OPR407-single.png
  • Other image-related equipment

Added to bookmarks

Bookmarks list

Bookmark has been removed

Bookmarks list

You can't add any more bookmarks

By registering as a member, you can increase the number of bookmarks you can save and organize them with labels.

Free membership registration

Report on the Verification of Slope and Unevenness of Concrete Flooring for Chemical Plants

Visualize the slope and unevenness of the floor surface with laser scanning to reduce leakage risks!

In the chemical plant industry, the smoothness of the floor is crucial for safe operations. In particular, even slight inclines or unevenness in the floor cannot be overlooked in order to prevent leaks of chemicals and hazardous materials. Floor defects can lead to improper equipment installation and increase the risk of leaks. This document is a verification report aimed at confirming the precision of concrete floors within the plant. 【Usage Scenarios】 * Floors in chemical plants * Chemical storage areas * Hazardous material handling areas 【Benefits of Implementation】 * Reduced leak risk * Stable equipment operation * Improved safety

  • Other measurement, recording and measuring instruments

Added to bookmarks

Bookmarks list

Bookmark has been removed

Bookmarks list

You can't add any more bookmarks

By registering as a member, you can increase the number of bookmarks you can save and organize them with labels.

Free membership registration

Size measurement using a 3D scanner for apparel.

Revolutionizing size measurement in the apparel industry with a non-contact 3D scanner!

In the apparel industry, accurate size measurement tailored to customers' body shapes is essential. Particularly with the expansion of online sales, providing accurate size information in situations where trying on clothes is not possible has become crucial. If accurate size information cannot be provided, it may lead to decreased customer satisfaction and an increase in returns. Our 3D scanner achieves high-precision size measurement without contact, addressing these challenges. 【Use Cases】 - Obtaining customer body shape data - Pattern creation - Streamlining measurement operations 【Benefits of Implementation】 - Improved customer satisfaction - Reduced return rates - Cost savings through increased operational efficiency

  • Management consultant/Small business consultant
  • Other services

Added to bookmarks

Bookmarks list

Bookmark has been removed

Bookmarks list

You can't add any more bookmarks

By registering as a member, you can increase the number of bookmarks you can save and organize them with labels.

Free membership registration

[For New Graduates and Young Professionals] Waveform Measurement Using Pulse Generators and Oscilloscopes

Practical Book on the Standard Programming Language for Manufacturing Engineers "LabVIEW" - Part 2

We deliver a practical programming guide useful in the manufacturing field for new graduates and young engineers. This time, we will cover how to create a waveform measurement application using a signal generator and an oscilloscope. The signal generator and oscilloscope are essential measuring instruments in the manufacturing field dealing with electrical and electronic circuits. By mastering this text, you can say goodbye to manual measurements. If you are involved in automotive equipment, semiconductors, or electrical and electronic devices, this is a must-check!

Added to bookmarks

Bookmarks list

Bookmark has been removed

Bookmarks list

You can't add any more bookmarks

By registering as a member, you can increase the number of bookmarks you can save and organize them with labels.

Free membership registration

Flow measurement in the plant using a porous pitot tube flow meter.

The average flow velocity in the piping can be easily measured with a porous pitot tube.

The Pitot tube has a rod-like shape. It is inserted vertically into the piping to measure flow rate. Holes are provided on the rod to detect total pressure and static pressure. By measuring the differential pressure (also called dynamic pressure), the flow velocity of the fluid flowing in the pipe can be determined. The multi-hole Pitot tube has multiple holes on the rod that comply with JIS B 8330, allowing for the measurement of average flow velocity. The two pressure sensing pipes that exit the Pitot tube are connected to the high-pressure and low-pressure sides of a differential pressure transmitter. The differential pressure is converted to flow rate through square root calculation processing by the differential pressure transmitter. It is often used for measuring exhaust gas flow rates in large-diameter ducts. Large-diameter ducts (300A or 500A and above) cannot be manufactured with orifice plates or are very costly, making the Pitot tube flow meter a strong option. Among flow meters, the Pitot tube is simple and relatively low-cost.

Added to bookmarks

Bookmarks list

Bookmark has been removed

Bookmarks list

You can't add any more bookmarks

By registering as a member, you can increase the number of bookmarks you can save and organize them with labels.

Free membership registration

What is an infrared array sensor? An explanation of thermal imaging and temperature measurement.

【Manufacturing Line】【Robot】【IoT Sensing】Explaining infrared array sensors used in various fields for thermography and non-contact temperature sensors!

Explaining the "infrared array sensor" that applies thermopiles widely used in non-contact temperature sensors! SSC Corporation is the sole agent in Japan for the German company Heiman Sensors.

  • アレイセンサーの種類2.jpg
  • Radiation thermometer

Added to bookmarks

Bookmarks list

Bookmark has been removed

Bookmarks list

You can't add any more bookmarks

By registering as a member, you can increase the number of bookmarks you can save and organize them with labels.

Free membership registration

(Temperature management of food) Measuring temperature distribution with a thermal camera module.

Non-contact measurement of temperature distribution in food. It helps automate the manufacturing line.

SSC Corporation has launched the 'SSV Series' module to make the integration of temperature measurement devices easier. This product is a temperature measurement module that uses a thermopile array sensor, providing output in temperature-converted measurement values. In addition to the listed lineup, you can choose from a wide range of pixel counts (from 64 to 10,000 pixels) and field angles (from narrow to wide angles). We not only sell standard products but also accept custom and OEM orders tailored to customer needs, so please feel free to consult with us. [To make temperature measurement easier] - Easily measure temperature with output in temperature-converted values - Non-contact temperature measurement using infrared from the target object - No damage to the measured object, ensuring hygiene - Achieves high cost performance using thermopile array sensors *For more details, please refer to the related links or feel free to contact us.

  • Radiation thermometer

Added to bookmarks

Bookmarks list

Bookmark has been removed

Bookmarks list

You can't add any more bookmarks

By registering as a member, you can increase the number of bookmarks you can save and organize them with labels.

Free membership registration

Commissioned measurement: Weak current measurement during power supply

We will digitize the electrical characteristics of your company's work according to your desired specifications.

What happens at the contact point when power is applied? How does the contact resistance change? How much heat is generated at the contact point during high current flow? What is the resistance value in high-temperature environments? By measuring these factors, you can confirm what is actually happening. By combining several types of equipment, we can approach measurements that are closer to real-world conditions. We also accept requests for visits at any time. For more details, please contact us through our website. ○http://www.sankei-engineering.com/○

Added to bookmarks

Bookmarks list

Bookmark has been removed

Bookmarks list

You can't add any more bookmarks

By registering as a member, you can increase the number of bookmarks you can save and organize them with labels.

Free membership registration

Tension measurement

Compact and lightweight pillow block type load cell. It is ideal for tension measurement in the manufacturing processes of paper, textiles, plastics, and foil materials.

The BZV-A/BZH-A load cells manufactured by HAEHNE are small, lightweight, and highly reliable tension measurement sensors made from aircraft-grade aluminum and designed in a pillow block style. The measurement range is 0.1-0.5 kN, with a high accuracy of 0.5% (combined error), making them suitable for use as tension detection sensors in various manufacturing processes.

  • Other measurement, recording and measuring instruments

Added to bookmarks

Bookmarks list

Bookmark has been removed

Bookmarks list

You can't add any more bookmarks

By registering as a member, you can increase the number of bookmarks you can save and organize them with labels.

Free membership registration

R32 New Refrigerant Viscosity Measurement (For Process Control) Comprehensive Catalog

We offer a wide range of viscometers from lab-type to process control. Please contact us if you would like a demonstration!

Cambridge Viscosity, a specialized manufacturer of viscometers, holds a leading position internationally in the measurement of fluid viscosity. We develop and produce a wide range of products, from laboratory models to those for process control. At Japan Controls, we also have demo units available, so please contact us if you would like to request a demonstration! 【Features】 ● Innovative and highly efficient viscosity measurement technology ● Extremely high accuracy and easy maintenance ● Laboratory (for research and sampling) / process viscometers tailored to your applications 【Product Lineup】 ■ A variety of laboratory models convenient for sampling measurements ■ Process models - Real-time control within the line ⇒ Inline (installed in piping), in-tank (installed in tanks), and ultra-compact models Various sensor shapes and sizes are available to match installation conditions 【Applications】 Due to the fault-free structure of Cambridge viscometers, they are used in a wide range of fields including oil, ink, paint, coatings, pharmaceuticals, chemicals, automotive fuels, motor oils, petrochemicals, printing, biotechnology, and more. *For more details, please contact us.

Added to bookmarks

Bookmarks list

Bookmark has been removed

Bookmarks list

You can't add any more bookmarks

By registering as a member, you can increase the number of bookmarks you can save and organize them with labels.

Free membership registration

Viscometer, density measurement

The VP2100 is a highly reliable viscometer that effectively optimizes processes. It also allows for density measurement.

!! Density measurement is also possible !! The VP2100 series viscometer, a new product from Cambridge Viscosity, has been developed specifically for process control. The sensor, which incorporates a long-established reciprocating piston method, performs real-time measurements using a small amount of sample liquid. The installation of the sensor is easy, and it offers excellent maintainability, providing a stable signal even over long calibration intervals. The sensor is unaffected by external environmental factors, vibrations, or changes in flow rate. Additionally, it is highly durable and the system is not compromised even with heavy sample liquids outside the measurement range. <Advantages> - Low cost - Easy integration - Minimal maintenance - Quick return on investment !! For more details, please contact us !!

Added to bookmarks

Bookmarks list

Bookmark has been removed

Bookmarks list

You can't add any more bookmarks

By registering as a member, you can increase the number of bookmarks you can save and organize them with labels.

Free membership registration