iPROS Manufacturing
  • Search for products by classification category

    • Electronic Components and Modules
      Electronic Components and Modules
      61598items
    • Machinery Parts
      Machinery Parts
      75879items
    • Manufacturing and processing machinery
      Manufacturing and processing machinery
      101870items
    • Scientific and Physics Equipment
      Scientific and Physics Equipment
      36291items
    • Materials
      Materials
      37750items
    • Measurement and Analysis
      Measurement and Analysis
      55446items
    • Image Processing
      Image Processing
      15374items
    • Control and Electrical Equipment
      Control and Electrical Equipment
      54407items
    • Tools, consumables, and supplies
      Tools, consumables, and supplies
      65333items
    • Design and production support
      Design and production support
      12673items
    • IT/Network
      IT/Network
      45578items
    • Office
      Office
      14168items
    • Business support services
      Business support services
      25215items
    • Seminars and Skill Development
      Seminars and Skill Development
      6550items
    • Pharmaceutical and food related
      Pharmaceutical and food related
      33800items
    • others
      75275items
  • Search for companies by industry

    • Manufacturing and processing contract
      7333
    • others
      4982
    • Industrial Machinery
      4444
    • Machine elements and parts
      3325
    • Other manufacturing
      2885
    • Trading company/Wholesale
      2627
    • IT/Telecommunications
      2566
    • Industrial Electrical Equipment
      2317
    • Building materials, supplies and fixtures
      1816
    • software
      1658
    • Electronic Components and Semiconductors
      1581
    • Resin/Plastic
      1501
    • Service Industry
      1470
    • Testing, Analysis and Measurement
      1134
    • Ferrous/Non-ferrous metals
      987
    • environment
      698
    • Chemical
      641
    • Automobiles and Transportation Equipment
      579
    • Printing Industry
      512
    • Information and Communications
      464
    • Consumer Electronics
      411
    • Energy
      332
    • Rubber products
      317
    • Food Machinery
      308
    • Optical Instruments
      279
    • robot
      272
    • fiber
      253
    • Paper and pulp
      230
    • Pharmaceuticals and Biotechnology
      172
    • Electricity, Gas and Water Industry
      165
    • Warehousing and transport related industries
      149
    • Glass and clay products
      139
    • Food and Beverage
      129
    • CAD/CAM
      124
    • retail
      109
    • Medical Devices
      107
    • Educational and Research Institutions
      105
    • Ceramics
      98
    • wood
      88
    • Transportation
      82
    • Petroleum and coal products
      62
    • Medical and Welfare
      62
    • Shipbuilding and heavy machinery
      51
    • Aviation & Aerospace
      47
    • Fisheries, Agriculture and Forestry
      41
    • equipment
      40
    • Public interest/special/independent administrative agency
      31
    • Materials
      30
    • Research and development equipment and devices
      29
    • Government
      24
    • self-employed
      24
    • Mining
      17
    • cosmetics
      15
    • Finance, securities and insurance
      13
    • Restaurants and accommodations
      10
    • Individual
      10
    • Police, Fire Department, Self-Defense Forces
      7
    • Laboratory Equipment and Consumables
      5
    • Raw materials for reagents and chemicals
      4
    • Contracted research
      3
  • Special Features
  • Ranking

    • Overall Products Ranking
    • Overall Company Ranking
Search for Products
  • Search for products by classification category

  • Electronic Components and Modules
  • Machinery Parts
  • Manufacturing and processing machinery
  • Scientific and Physics Equipment
  • Materials
  • Measurement and Analysis
  • Image Processing
  • Control and Electrical Equipment
  • Tools, consumables, and supplies
  • Design and production support
  • IT/Network
  • Office
  • Business support services
  • Seminars and Skill Development
  • Pharmaceutical and food related
  • others
Search for Companies
  • Search for companies by industry

  • Manufacturing and processing contract
  • others
  • Industrial Machinery
  • Machine elements and parts
  • Other manufacturing
  • Trading company/Wholesale
  • IT/Telecommunications
  • Industrial Electrical Equipment
  • Building materials, supplies and fixtures
  • software
  • Electronic Components and Semiconductors
  • Resin/Plastic
  • Service Industry
  • Testing, Analysis and Measurement
  • Ferrous/Non-ferrous metals
  • environment
  • Chemical
  • Automobiles and Transportation Equipment
  • Printing Industry
  • Information and Communications
  • Consumer Electronics
  • Energy
  • Rubber products
  • Food Machinery
  • Optical Instruments
  • robot
  • fiber
  • Paper and pulp
  • Pharmaceuticals and Biotechnology
  • Electricity, Gas and Water Industry
  • Warehousing and transport related industries
  • Glass and clay products
  • Food and Beverage
  • CAD/CAM
  • retail
  • Medical Devices
  • Educational and Research Institutions
  • Ceramics
  • wood
  • Transportation
  • Petroleum and coal products
  • Medical and Welfare
  • Shipbuilding and heavy machinery
  • Aviation & Aerospace
  • Fisheries, Agriculture and Forestry
  • equipment
  • Public interest/special/independent administrative agency
  • Materials
  • Research and development equipment and devices
  • Government
  • self-employed
  • Mining
  • cosmetics
  • Finance, securities and insurance
  • Restaurants and accommodations
  • Individual
  • Police, Fire Department, Self-Defense Forces
  • Laboratory Equipment and Consumables
  • Raw materials for reagents and chemicals
  • Contracted research
Special Features
Ranking
  • Overall Products Ranking
  • Overall Company Ranking
  • privacy policy
  • terms of service
  • About Us
  • Careers
  • Advertising
  1. Home
  2. Ferrous/Non-ferrous metals
  3. 永和工芸
  4. Product/Service List
Ferrous/Non-ferrous metals
  • Added to bookmarks

    Bookmarks list

    Bookmark has been removed

    Bookmarks list

    You can't add any more bookmarks

    By registering as a member, you can increase the number of bookmarks you can save and organize them with labels.

    Free membership registration

永和工芸

EstablishmentDecember 1958
capital1000Ten thousand
number of employees10
addressOsaka/Hirano-ku, Osaka-shi/Kizuren 5-5-60
phone06-6709-2349
  • Special site
  • Official site
last updated:Mar 16, 2026
永和工芸logo
  • Contact this company

    Inquiry Form
  • Before making an inquiry

    Download Profile
  • Company information
  • Products/Services(271)
  • catalog(8)
  • news(0)

永和工芸 Product Lineup

  • category

1~45 item / All 271 items

Displayed results

Filter by category

単品・小ロットライン 単品・小ロットライン
量産塗装する仕組み 量産塗装する仕組み
試験塗装する仕組み 試験塗装する仕組み
class="retina-image"

What are the causes of defects when newcomers paint? Three key points of education.

Even though it's the same procedure manual, only the newcomers are producing defects. I will articulate the three key points that are not written in the manual.

Even though the same procedure manual is provided, only the newcomers are producing defects. What is lacking is not experience, but the ability to articulate. ────────────── ■Cause of Occurrence The procedure manual contains numerical values, but the rationale for the judgments is not included. Without knowing why those values are set, one cannot respond when conditions change. ■Truth The most common defects among newcomers are related to gun distance, operating speed, and overlap width. A difference of just 5 centimeters in gun distance can change the film thickness by 20%. Experienced individuals unconsciously make adjustments, so those teaching may not even realize this. ■Improvement Measures Clearly specify the gun distance, operating speed, and overlap width with numerical values, and have them confirmed with actual items. Keep defective products as teaching materials and show the causes and conditions together. Please utilize the management item checklist for newcomer training.

  • others

Added to bookmarks

Bookmarks list

Bookmark has been removed

Bookmarks list

You can't add any more bookmarks

By registering as a member, you can increase the number of bookmarks you can save and organize them with labels.

Free membership registration

What is the cause of increased defects when production is increased? Compression of drying time.

As the numbers increase, the defect rate skyrockets. We will identify which processes are prone to cuts using data.

The months when production numbers increase are the only times the defect rate skyrockets. It's not that skills have declined; rather, time is being cut. ────────────── ■Cause of Occurrence The first thing to be reduced in increased production is the waiting time for drying and setup. Since waiting time is not visible in the work process, its reduction goes unnoticed. ■The Truth If you cut 5 minutes from the drying after degreasing, moisture remains, leading to adhesion failures. If you compress the retention time in the curing furnace, it results in insufficient hardening, causing stickiness and softening. Defects appear in processes several days later, so the relationship with increased production is not apparent. ■Improvement Measures Clearly state drying and setup as work time in the process chart. Set a daily input limit based on the furnace's capacity, and if exceeded, outsource the excess. Please utilize the process management materials during increased production.

  • others

Added to bookmarks

Bookmarks list

Bookmark has been removed

Bookmarks list

You can't add any more bookmarks

By registering as a member, you can increase the number of bookmarks you can save and organize them with labels.

Free membership registration

What causes things not to dry when the temperature drops? Thinner switching.

Despite having the same conditions as summer, the drying is poor. This explains how to review solvent selection and curing time during temperature drops.

Even though I painted under the same conditions as in summer, the drying has become poor. What has changed is not the paint, but the temperature. ────────────── ■Cause of Occurrence The evaporation rate of thinner varies greatly with temperature. Using slow-drying thinner intended for summer in the autumn and beyond prevents the solvent from fully evaporating. ■The Truth When the temperature drops by 10 degrees, the evaporation time of the solvent roughly doubles. The remaining solvent escapes from the inside during curing, creating voids and pinholes. The surface may dry, but the interior remains uncured, leading to issues in the next process. ■Improvement Measures Determine and display the brand and dilution ratio of thinner for each temperature range. Ensure adequate setting time and fully remove the solvent before curing. Please utilize the seasonal thinner selection chart.

  • others

Added to bookmarks

Bookmarks list

Bookmark has been removed

Bookmarks list

You can't add any more bookmarks

By registering as a member, you can increase the number of bookmarks you can save and organize them with labels.

Free membership registration

What is the cause of only the first batch of products in the morning being defective? Furnace startup.

Only a few defects occur right after the start of operations. I will explain the management methods until the furnace and booth reach a steady state.

Only a few pieces right after starting production consistently have defects. The operators are the same. The difference is the temperature of the equipment. ────────────── ■ Cause of Occurrence Both the curing furnace and the booth are not stable immediately after startup from a stop. Even if the displayed temperature reaches the set point, the furnace walls and jigs remain cold. ■ Truth When the furnace walls are cold, they draw heat from the product, lowering the actual curing temperature. Until the booth's air conditioning stabilizes, the humidity is also high, making defects more likely. The recorded temperature reflects the set value, so the cause remains unidentified and repeats. ■ Improvement Measures Decide on a pre-heating time before starting production and preheat each jig before running them through. For the first few pieces, only run waste boards or jigs, and once conditions stabilize, proceed with the main flow. Please utilize the standardization materials for the startup procedure.

  • others

Added to bookmarks

Bookmarks list

Bookmark has been removed

Bookmarks list

You can't add any more bookmarks

By registering as a member, you can increase the number of bookmarks you can save and organize them with labels.

Free membership registration

What causes the visible seams of overlapping paint? Management of paint transitions.

A line appears in the center of the large object. The occurrence of boundaries is suppressed by the overlap width of the gun and the time for applying the paint.

In the center of the large surface, a faint line can be seen. Even though the color is the same, why does a boundary appear? ────────────── ■Cause of Occurrence Surfaces that cannot be painted in one go are painted in multiple layers. If you overlap after the previously painted side starts to dry, there will be a difference in film thickness and gloss. ■Truth The allowable time for overlapping paint is short, ranging from several seconds to a few minutes, and varies by season. When the overlap width of the spray gun falls below half, the film thickness at the boundary becomes thinner. The line is only visible from an angle, so it can be overlooked during a frontal inspection. ■Improvement Measures Ensure that the overlap width of the spray gun is 50 percent and maintain a constant operating speed. Decide the overlapping position in advance and paint continuously in the same direction. Please utilize the materials on the painting procedure for large items.

  • others

Added to bookmarks

Bookmarks list

Bookmark has been removed

Bookmarks list

You can't add any more bookmarks

By registering as a member, you can increase the number of bookmarks you can save and organize them with labels.

Free membership registration

What causes screws to not fit? Management of the coating thickness in the screw area.

After painting, the bolts do not fit. I will explain in detail the thickness of the paint film on the threaded area and the masking method.

The painting is fine, but the bolt won't fit. The cause is the paint film on the threads. ────────────── ■ Cause of Occurrence Paint also gets inside the internal threads. The gaps between the peaks and valleys of the threads are small, and even a slight film thickness can cause interference. ■ Truth A paint film of 30 microns on one side calculates to a reduction of 60 microns in diameter. Powder coating tends to have a thicker film, making it more prone to interference than solvent-based painting. If there are no painting instructions on the drawing, it is assumed that the threaded areas will also be painted. ■ Improvement Measures The threaded areas will be completely sealed with masking caps or temporary bolt tightening. Non-painted areas will be clearly specified on the drawings, and confirmation will be made at the time of order. Please utilize the document summarizing the methods for specifying non-painted areas.

  • others

Added to bookmarks

Bookmarks list

Bookmark has been removed

Bookmarks list

You can't add any more bookmarks

By registering as a member, you can increase the number of bookmarks you can save and organize them with labels.

Free membership registration

What causes parts to warp when heated? Measures against thermal deformation of thin plates.

When I took it out of the oven, the plate was warped. I will explain how to suppress thermal deformation caused by the difference in heating and cooling speeds.

After taking it out of the furnace, the flat plate was warped. This is not a painting issue, but a problem with how the heat was applied. ────────────── ■Cause of Occurrence Metals expand when heated and contract when cooled. If there is a temperature difference on the front and back or between different areas of the plate, the difference in contraction leads to warping. ■Truth Thin plates with a thickness of 1.0mm or less can warp even with a temperature difference of 10 degrees. Residual stress introduced during pressing or welding is released all at once when heated. If there is a temperature difference between the entrance and exit sides of the furnace, the difference between areas is amplified. ■Improvement Measures Gradually increase the temperature and cool down slowly to avoid rapid cooling. For parts that are prone to warping, bake them while restrained with reinforcing jigs. Please utilize the materials summarizing the baking conditions for thin plate components.

  • others

Added to bookmarks

Bookmarks list

Bookmark has been removed

Bookmarks list

You can't add any more bookmarks

By registering as a member, you can increase the number of bookmarks you can save and organize them with labels.

Free membership registration

What causes paint to string? Viscosity and solvent balance.

Paint stretches and adheres like threads from the gun. The stringing is stopped by the viscosity and the evaporation rate of the solvent.

The moment it is blown, the paint stretches like a thread and adheres to the product. It is not a malfunction of the gun, but rather the condition of the paint. ────────────── ■Cause of Occurrence If the viscosity is too high, the paint does not become mist and is stretched into threads. If the solvent evaporates too quickly, it can solidify in mid-air and create threads. ■Truth A difference of just 5 degrees in temperature visibly changes the viscosity. Using paint that is cold in the morning without adjustment increases the viscosity. Continuing to use fast-drying thinner with a summer mindset can have the opposite effect in autumn and beyond. ■Improvement Measures Before use, adjust the paint temperature to around 20 degrees and check the viscosity with a viscometer each time. Use standard and slow-drying thinners according to the temperature range. Please utilize the materials for viscosity management and thinner selection.

  • others

Added to bookmarks

Bookmarks list

Bookmark has been removed

Bookmarks list

You can't add any more bookmarks

By registering as a member, you can increase the number of bookmarks you can save and organize them with labels.

Free membership registration

What is the cause of the thin area around the hole? Static electricity and film thickness distribution.

The film thickness gauge is acceptable, but the coating is thin only around the hanging hole. I will explain the relationship between the escape path of static electricity and posture.

The film thickness inspection passes, but the area around the hanging hole is discolored. Changing the measurement location results in different numbers. ────────────── ■Cause of Occurrence In electrostatic painting, the charge concentrates at the hanging points where electricity flows most easily. The surrounding electric field becomes disturbed, making it difficult for the paint to adhere. ■Truth The area around the hanging hole may have only about half the film thickness of the flat surface. Since the film thickness gauge measures the center of the flat surface, this deficiency passes the inspection. Rust begins in the thin areas and leads to complaints a few months later. ■Improvement Measures Move the hanging position away from the visible surface and, if possible, shift it towards the waste hole side. Change the posture to apply the paint in two separate applications or partially add more paint. Please utilize the materials on hanging methods and film thickness distribution.

  • others

Added to bookmarks

Bookmarks list

Bookmark has been removed

Bookmarks list

You can't add any more bookmarks

By registering as a member, you can increase the number of bookmarks you can save and organize them with labels.

Free membership registration

What causes fingerprints to remain on the paint? Barehanded work and oil residue.

Even though I painted it neatly, the shape of my fingers is showing through. I will explain the mechanism of how the oil from the hands repels the paint film and the management of gloves.

After applying, the shape of the fingers has emerged. It is not dirt. It is a mark left by bare hands. ────────────── ■Cause of occurrence Human hands always have sebum and sweat. The oil on the material can be removed by degreasing, but if touched after degreasing, it will remain. ■Truth Even the sebum from one finger can cause the paint to repel in that area. Hand creams and silicone-based hair products repel particularly strongly. It is not visible immediately after drying, but it appears as a contour after curing. ■Improvement measures Always wear cotton gloves during the process after degreasing, and prohibit bare-hand work. Gloves absorb oil, so establish a replacement standard based on time or quantity. Please utilize the materials summarizing the handling standards after pretreatment.

  • others

Added to bookmarks

Bookmarks list

Bookmark has been removed

Bookmarks list

You can't add any more bookmarks

By registering as a member, you can increase the number of bookmarks you can save and organize them with labels.

Free membership registration

What is the reason for the uncertainty in the painting delivery schedule? Waiting for the batch in the curing oven.

Although the quantity is small, the delivery time is long. The cause lies in the batch unit of the baking furnace and the setup for color changes.

Although the quantity is small, the delivery time for painting is unpredictable. The reason is not the processing time, but the waiting time for the furnace and color change. ────────────── ■Cause of Occurrence Baked painting operates on a batch basis in the furnace, so even one piece uses one batch. Additionally, color changes require cleaning setup for the booth and piping. ■The Truth The setup for color changes takes anywhere from several tens of minutes to several hours each time. As a result, production plans prioritize consolidating the same color, and small quantities of different colors are postponed. The time for drying and cooling is also fixed in the process, so compression is not possible. ■Improvement Measures Consolidate colors and quantities when placing orders to reduce the number of color changes. Pre-register standard colors and share the standard lead times for each color. Please utilize the materials for considering lead time reduction.

  • others

Added to bookmarks

Bookmarks list

Bookmark has been removed

Bookmarks list

You can't add any more bookmarks

By registering as a member, you can increase the number of bookmarks you can save and organize them with labels.

Free membership registration

What is the reason for the difference in painting estimates between companies? The difference in the number of pre-treatment processes.

The estimates differ by double on the same drawing. The cause of the difference is not the paint, but the number of pre-treatment processes. Here’s an explanation of the perspective for comparison.

Even though we submitted the same drawings, the estimates differ by nearly double between companies. It's not due to the paint difference; it's due to the difference in the number of pre-treatment processes. ────────────── ■Cause of Occurrence The cost of metal baked painting is determined more by the pre-treatment than by the painting itself. There is a significant difference in effort between three processes that only involve degreasing and seven processes that include chemical treatment. ■Truth Low estimates may omit chemical treatment, relying only on degreasing and rinsing. While the appearance may be the same immediately after delivery, differences in rust and peeling will appear outdoors after six months. If there is no pre-treatment specification in the drawings, each company will estimate using the cheapest process. ■Improvement Measures Clearly specify the number of pre-treatment processes and the type of chemical treatment when requesting estimates. Including the required film thickness and salt spray test duration will align the conditions. Please utilize comparison materials on pre-treatment processes and quality differences.

  • others

Added to bookmarks

Bookmarks list

Bookmark has been removed

Bookmarks list

You can't add any more bookmarks

By registering as a member, you can increase the number of bookmarks you can save and organize them with labels.

Free membership registration

What are the reasons for the inability to read the costs of repainting? The cost structure of repainting.

The loss of one defective item is not just the cost of painting. We will break down the true cost, including stripping and re-preparation.

Are you calculating the loss of one defective coating at the coating unit price? The actual loss is several times that amount. ────────────── ■Cause of Occurrence Repainting requires four processes: stripping, re-preparation, repainting, and re-inspection. In addition to the process of painting new items, the costs of stripping and re-preparation are added in full. ■The Truth The stripping process requires chemicals and time, making the unit cost higher than new painting. Additionally, there are expedited shipping costs due to delivery delays and opportunity losses from line stoppages. If the material is thin sheet or aluminum, there is also a risk of damaging the material itself during stripping. ■Improvement Measures Estimate the effect of reducing the defect rate by 1 percent based on the costs of the four processes. Strengthening the management of pre-treatment and film thickness is often cheaper than rework costs. Please utilize the estimation materials for repainting losses.

  • others

Added to bookmarks

Bookmarks list

Bookmark has been removed

Bookmarks list

You can't add any more bookmarks

By registering as a member, you can increase the number of bookmarks you can save and organize them with labels.

Free membership registration

What causes lumps in paint? Management of usable time and storage temperature.

Bumps appear on the blown surface. It may not be a foreign substance but rather the gelation of the paint. I will explain the storage conditions.

Bumps appear on the painted surface. Even with foreign matter countermeasures, they do not decrease. It may be due to gelation on the paint side. ────────────── ■Cause of Occurrence Two-component paints begin to react and increase in viscosity the moment they are mixed. Once the usable time is exceeded, microscopic gels form, resulting in bumps on the paint surface. ■Truth Usable time varies significantly with temperature. In a 30-degree environment, the usable time based on 20 degrees is reduced to nearly half. In summer, material storage areas can exceed 40 degrees during the day, and even unopened cans can deteriorate. ■Improvement Measures Record the mixing time on the can and display the usable time according to the temperature. Store paint in a controlled environment between 5-25 degrees and avoid direct sunlight. Please utilize the management materials for paint storage and usable time.

  • others

Added to bookmarks

Bookmarks list

Bookmark has been removed

Bookmarks list

You can't add any more bookmarks

By registering as a member, you can increase the number of bookmarks you can save and organize them with labels.

Free membership registration

What causes color changes in a batch? Mixing and baking time.

Even though the paint is the same and has the same color number, the color differs between batches. I will explain the effects of insufficient mixing and differences in curing time.

Even though it's the same color number of paint, the color is different from last month's batch. The paint hasn't been changed. So what has changed? ────────────── ■Cause of Occurrence Pigments settle due to differences in specific gravity, so if mixing is insufficient, the hue will shift. Additionally, if the curing time is extended, white and light colors will shift towards yellowing. ■Truth There can be color differences between the surface and the bottom of the can, even with the same paint right after opening. Just a 10-minute increase in dwell time in the oven can result in noticeable color differences. If the film thickness changes by 10 microns, the visibility due to substrate transparency will also change. ■Improvement Measures Standardize the mixing time before use in minutes and keep a record. Manage the curing process including the dwell time in the oven, and verify color samples against the actual product for each batch. Please utilize the documentation that summarizes the standardized procedures for color difference management.

  • others

Added to bookmarks

Bookmarks list

Bookmark has been removed

Bookmarks list

You can't add any more bookmarks

By registering as a member, you can increase the number of bookmarks you can save and organize them with labels.

Free membership registration

What causes residue from masking adhesive? Heat-resistant tape and removal timing.

When the tape is removed, the adhesive remains burned on. This explains the procedure to prevent adhesive residue based on heat resistance temperature and peeling timing.

When the tape was removed, the adhesive remained as a line. It won't come off even when wiped. The cause is temperature and time. ────────────── ■ Cause of Occurrence The adhesive of masking tape decomposes and transfers to the material side when the heat resistance temperature is exceeded. Regular paper tape has a limit of around 120 degrees, and it cannot withstand baking conditions. ■ Truth The adhesive hardens more as it cools after baking, increasing the release strength. If removed after the material temperature has completely cooled down, the adhesive layer is more likely to remain. Hardened adhesive can damage the paint film when wiped with a solvent, leading to secondary defects. ■ Improvement Measures Select a heat-resistant tape with a margin of more than 20 degrees above the baking temperature. Removal should be done after baking, while the material temperature is between 60-80 degrees. Please utilize the documentation on masking conditions and tape selection.

  • others

Added to bookmarks

Bookmarks list

Bookmark has been removed

Bookmarks list

You can't add any more bookmarks

By registering as a member, you can increase the number of bookmarks you can save and organize them with labels.

Free membership registration

What are the causes of powder coating not adhering? Grounding issues and jig management.

Despite the same conditions, only some products do not have powder on them. I will explain the grounding resistance of electrostatic coating and the dirt on the fixtures.

Even though it's being blown under the same conditions, only this product does not have powder sticking to it. It's not the gun; the culprit might be the jig. ────────────── ■Cause of Occurrence Powder coating relies on static electricity to attract the powder, so proper grounding is essential. When paint accumulates on the jig, it becomes an insulator, preventing electricity from escaping. ■Truth In the field, it is common to use a single jig for dozens of consecutive applications. When the grounding resistance exceeds 1 megaohm, the adhesion efficiency visibly drops. The powder will not stick first to the lower or inner parts, leading to a misinterpretation of a partial thin film. ■Improvement Measures Regularly remove the coating from the jig using an incinerator or stripping tank to restore the contact points to their base material. Measure the grounding resistance before use, setting a passing condition of below 1 megaohm. Please utilize the jig management and electrostatic condition documentation.

  • others

Added to bookmarks

Bookmarks list

Bookmark has been removed

Bookmarks list

You can't add any more bookmarks

By registering as a member, you can increase the number of bookmarks you can save and organize them with labels.

Free membership registration

What causes rust at the corners of Bali? Edge coating and chamfer management.

The surface is intact, yet only the corners of the cut surface are rusting. I will explain the key points of edge rust prevention based on the relationship between burrs and film thickness.

The surface is clean, yet only the cut corners start to rust. Even though it's not a case of forgetting to paint, why does it begin at the corners? ────────────── ■ Cause of Occurrence Paint does not adhere to sharp edges with remaining burrs. The paint film escapes from the corners due to surface tension, resulting in a film thickness of about one-third of that on the flat surface. ■ The Truth When the film thickness at the corners falls below 10 microns, corrosion resistance is almost completely lost. Slag from laser cutting and burrs from pressing retain moisture even after drying. Since the film thickness gauge can only measure flat surfaces, this deficiency goes unnoticed during inspection. ■ Improvement Measures Ensure that the chamfer is at least 0.3mm and fix the burr removal process before pre-treatment. Use edge primers or powder coating to cover the corners. Please utilize the materials summarizing the methods for measuring edge film thickness.

  • others

Added to bookmarks

Bookmarks list

Bookmark has been removed

Bookmarks list

You can't add any more bookmarks

By registering as a member, you can increase the number of bookmarks you can save and organize them with labels.

Free membership registration

What causes the painted surface to stick? Cooling management to prevent stacking marks.

When I opened the package, the painted surfaces were stuck together. I will explain the cooling time and loading conditions to prevent blocking issues.

When I opened the package, the painted surfaces were stuck together. Even though they should be cured, why are they sticking? ────────────── ■Cause of Occurrence Even though the paint film is cured immediately after baking, the internal temperature remains high and in a soft state. When pressure is applied, the surfaces come into close contact, leading to blocking. ■Truth The paint film becomes completely stable only after the material temperature drops below 40 degrees. Thick die-cast parts maintain an internal temperature above 60 degrees even when the surface cools. In summer, the room temperature is high, and the natural cooling time takes twice as long as expected. ■Improvement Measures Confirm that the material temperature is below 40 degrees before proceeding to packaging. It is also effective to manage the film thickness not at the upper limit but closer to the target value. Please utilize the management materials for cooling time and loading conditions.

  • others

Added to bookmarks

Bookmarks list

Bookmark has been removed

Bookmarks list

You can't add any more bookmarks

By registering as a member, you can increase the number of bookmarks you can save and organize them with labels.

Free membership registration

What is the cause of paint peeling only at the welded areas? Residual scale.

The base material is unharmed, but only the area around the bead has the paint film lifting. We will stop the peeling of the weld area with the removal procedure for spatter and scale.

Only the welded parts have the paint film peeling around the bead. Why does it peel off only in that area when the base material is unharmed? ────────────── ■Cause of occurrence Welded areas retain spatter and black oxide scale. Since the scale itself is detached from the base material, it peels off along with the paint film. ■Truth The adhesion strength of the oxide scale is less than one-tenth of that of a healthy base material surface. A pre-treatment line that only degreases will not remove the scale. Even a thin oxide film that is not visibly black can be a starting point for peeling. ■Improvement measures Spatter should be mechanically removed, and the scale must be reliably removed by acid pickling or blasting. Flow into pre-treatment within 24 hours after welding to prevent re-rusting and moisture absorption. Please utilize the materials summarizing the pre-treatment conditions for welded structures.

  • others

Added to bookmarks

Bookmarks list

Bookmark has been removed

Bookmarks list

You can't add any more bookmarks

By registering as a member, you can increase the number of bookmarks you can save and organize them with labels.

Free membership registration

What causes the smell of paint to linger? Management of residual solvents.

Although it feels dry to the touch, the solvent smell doesn't go away. I will explain the management points to detect internal moisture that hasn't dried.

The surface is dry, but the smell of thinner remains. The inside of the paint film is still not dry. ────────────── ■ Cause of Occurrence Residual solvent occurs when only the surface dries first, forming a film while the solvent inside is trapped. The thicker the film and the higher the initial drying temperature, the more likely this occurs. ■ Truth A paint film that retains odor lacks hardness and adhesion. Rapidly increasing the temperature without allowing for a set time leads to surface hardening occurring first. ■ Improvement Measures After painting, ensure a set time of 5 to 10 minutes at room temperature. Drying should be done by gradually increasing the temperature from a low temperature, and keep the thickness of a single layer below 30 microns. Please utilize the management materials for set time and temperature increase conditions.

  • others

Added to bookmarks

Bookmarks list

Bookmark has been removed

Bookmarks list

You can't add any more bookmarks

By registering as a member, you can increase the number of bookmarks you can save and organize them with labels.

Free membership registration

What causes white stains to remain after drying? Measures against water stains.

White ring stains left after cleaning. This explains how to prevent them before painting by managing water quality and drying time.

Even though it has been cleaned, white water stains remain. The culprit is the minerals contained in tap water. ────────────── ■ Cause of Occurrence Water stains are a phenomenon where minerals like calcium, which were dissolved in water droplets, remain and solidify as white marks when the droplets dry. If painted over as is, these will be trapped in the paint film as foreign substances, leading to peeling later on. ■ The Truth Wiping only spreads the water droplets, leaving the minerals on the surface. During warmer periods, the drying of water droplets is faster, making it easier for stains to set in. ■ Improvement Measures Switch the final rinse to pure water or deionized water. After cleaning, blow away the water droplets and ensure the time before moving to the drying oven is within 5 minutes. Please utilize the materials on the washing process and drying management.

  • others

Added to bookmarks

Bookmarks list

Bookmark has been removed

Bookmarks list

You can't add any more bookmarks

By registering as a member, you can increase the number of bookmarks you can save and organize them with labels.

Free membership registration

What causes the coating to be scratched by nails? Insufficient hardness and burn-in.

The paint film is scratched by nails after delivery. The cause lies not in the performance of the paint, but in the curing temperature and time.

It was reported that there were nail marks at the delivery destination. It may not be due to the hardness of the paint, but rather a possibility of insufficient curing. ────────────── ■ Cause of Occurrence Insufficient hardness indicates that the cross-linking reaction of the resin has not been completed. Curing time is counted from when the part itself reaches the specified temperature, not from when the set temperature is reached. ■ Truth Even if the furnace is set to 180 degrees for 20 minutes, thick parts take 10 minutes to reach the required temperature. The actual curing time is only 10 minutes, resulting in insufficient hardening. ■ Improvement Measures Attach a thermocouple to the product and manage the holding time after the required temperature is reached. Separate batches for products with significant thickness differences. Please utilize the documentation for temperature management and curing time settings.

  • others

Added to bookmarks

Bookmarks list

Bookmark has been removed

Bookmarks list

You can't add any more bookmarks

By registering as a member, you can increase the number of bookmarks you can save and organize them with labels.

Free membership registration

What causes bleeding at the masking edge? Basics of application.

The bleeding and burrs at the edges are not due to the quality of the tape. They are determined by how it is applied and when it is removed.

The masking bleeds at the edges. Changing the tape does not fix it. The issue lies in the way it is applied and the order of removal. ────────────── ■ Cause of Occurrence Bleeding occurs when paint seeps into the gap created by the lifted edge of the tape. If there are oils left on the material, adhesion decreases, leading to lifting. ■ Truth Burrs occur when removed after curing. If pulled after the paint film has hardened, it tears at the edges and frays. ■ Improvement Measures Apply tape after degreasing and press the edges down with your finger to eliminate lifting. Remove the tape at a 45-degree angle from the outer side while the paint film is in a semi-cured state before setting. Please use the materials on the application of masking and the removal procedure.

  • others

Added to bookmarks

Bookmarks list

Bookmark has been removed

Bookmarks list

You can't add any more bookmarks

By registering as a member, you can increase the number of bookmarks you can save and organize them with labels.

Free membership registration

What are the causes of scratches on the painted surface? Three points: transportation and fixtures.

Scratches occur not during the painting process, but during transportation and with fixtures. I will explain three measures that include packaging.

Scratches on finished products. Before questioning the painting process, please check the handling method. Many scratches occur after painting. ────────────── ■ Cause of occurrence The paint film immediately after curing is not fully hardened, and hardness continues to increase for 24 hours. Contact and stacking during this period are the main causes of dents and scratches. ■ The truth If the hanging position of the jig is different each time, the location of the contact marks will also change, making it impossible to identify the cause. Shortening the cooling time is the most common trigger. ■ Improvement measures After curing, cool to room temperature and ensure sufficient hardening time before handling. Fix the hanging position of the jig according to the drawings and unify the contact surfaces to the non-design side of the product. Please utilize the materials summarizing the handling and jig management procedures.

  • others

Added to bookmarks

Bookmarks list

Bookmark has been removed

Bookmarks list

You can't add any more bookmarks

By registering as a member, you can increase the number of bookmarks you can save and organize them with labels.

Free membership registration

What causes the substrate to be transparent? Poor concealment and film thickness design.

The transparency of red and yellow is not solely due to the lack of hiding power in the paint. We will reconsider the undercoating design and film thickness.

When painting with red or yellow, the base layer shows through. Are you increasing the number of coats and labor hours unnecessarily? ────────────── ■Cause of Occurrence Poor hiding occurs when colors with low pigment hiding power do not reach the required film thickness. Red, yellow, and orange colors require approximately 1.5 times the film thickness needed for white or black for adequate hiding. ■Truth Relying on multiple coats to solve the issue can lead to new problems such as drips and chipping due to excessive film thickness. The essence lies not in the topcoat but in the color design of the primer. ■Improvement Measures Change the primer to a gray or similar color that is closer to the final color, and reduce the thickness of the topcoat. Ensure that color variations in the material are made uniform during the pre-treatment stage. Please utilize the recommended film thickness and primer design materials for each color.

  • others

Added to bookmarks

Bookmarks list

Bookmark has been removed

Bookmarks list

You can't add any more bookmarks

By registering as a member, you can increase the number of bookmarks you can save and organize them with labels.

Free membership registration

What causes variations in film thickness? Three basic points for measurement and management.

Variations in film thickness are not due to differences in skill. This explanation will cover management methods that reconsider measurement points, jigs, and positions within the furnace.

The film thickness varies every time it is measured. Do you think it's due to the operator's skill? The cause lies in the measurement and hanging methods. ────────────── ■Cause of Occurrence Variability in film thickness arises from differences in static electricity due to the shape of the material and inconsistencies in measurement points. Even with the same part, there can be up to a 2-fold difference in film thickness between recessed and flat areas. ■Truth If measurements are taken without determining specific points, half of the variability is measurement error. Temperature differences due to the position within the furnace also affect film thickness; a 5-degree difference inside the chamber can change fluidity. ■Improvement Measures Fix three or more measurement points on the drawing and record separately for flat and recessed areas. Check the electrical connection of the jig daily and regularly measure the temperature distribution inside the furnace. Please utilize the documentation summarizing the criteria for setting film thickness measurement points.

  • others

Added to bookmarks

Bookmarks list

Bookmark has been removed

Bookmarks list

You can't add any more bookmarks

By registering as a member, you can increase the number of bookmarks you can save and organize them with labels.

Free membership registration

What causes paint film to crack? Three conditions to prevent cracking.

The paint film cracks due to bending and temperature changes. Thickening and over-baking take away flexibility. It can be prevented by optimizing film thickness and baking conditions.

Bending during assembly and temperature changes in winter cause fine cracks in the paint film. This is not an issue of the paint's flexibility, but rather a problem with the application method and curing process. When the film thickness exceeds 60 microns, the crack occurrence rate skyrockets. ────────────── ■ Causes of Occurrence Thick paint films cannot keep up with the expansion and contraction of the material, leading to cracking due to internal stress. If the curing is excessive, the resin's cross-linking progresses too far, making it hard and brittle. ■ The Truth The thick coating intended to prevent defects is causing further defects. There are many cases where increasing the film thickness for rust prevention results in a high incidence of cracks. ■ Improvement Measures Design the film thickness to be 30-50 microns according to the material and application. Keep the curing temperature and time within the paint specifications, and manage the temperature difference in the oven to within 10 degrees. Please utilize the materials that summarize the management standards for film thickness design and curing conditions.

  • others

Added to bookmarks

Bookmarks list

Bookmark has been removed

Bookmarks list

You can't add any more bookmarks

By registering as a member, you can increase the number of bookmarks you can save and organize them with labels.

Free membership registration

What is the reason for the inability to coat recesses in powder coating? The barrier of static electricity.

Only the inner sides of the box and the bottoms of the deep ribs do not have a film thickness. I will explain the Faraday cage phenomenon that prevents static electricity from entering and the countermeasures.

Only the inside of the box and the bottom of deep ribs do not receive powder no matter how much is blown. This is not a problem with the gun; it is caused by the nature of static electricity. When the depth of the recess exceeds 1.5 times its width, the powder cannot reach it. ────────────── ■ Cause of occurrence Electric field lines concentrate at the corners of the entrance of the recess and do not penetrate inside. Charged powder is attracted to the corners, leaving the back uncoated. ■ Truth Increasing the voltage has the opposite effect. At high voltage, adhesion at the entrance increases, further hindering access to the interior. ■ Improvement measures Lower the voltage and increase the air pressure to mechanically push the powder in. Depending on the shape, switching to solvent-based powder coating is reliable, and preliminary test coatings are effective. Please utilize the materials summarizing suitable shapes for powder coating.

  • others

Added to bookmarks

Bookmarks list

Bookmark has been removed

Bookmarks list

You can't add any more bookmarks

By registering as a member, you can increase the number of bookmarks you can save and organize them with labels.

Free membership registration

What causes the peeling of layered paint? The three barriers to interlayer adhesion.

The base is fine, but only the repaired layer is peeling off. The hardened paint film does not adhere. Surface preparation and time management will be the turning point.

Although there is no problem with adhesion to the substrate, only the layered coats are peeling off. The complete curing of the primer, on the contrary, is causing the peeling. Repainting after complete curing results in adhesion strength being less than half. ────────────── ■ Cause of Occurrence The cured paint film has no reactive groups left, making it impossible to chemically bond with the topcoat. Due to the smooth surface, there is also no mechanical grip. ■ Truth The longer the waiting time, the easier it is to peel off. Oils or hand grease that adhere after baking create a thin film between the layers. ■ Improvement Measures Before repainting, perform surface sanding and degreasing before applying paint. If the condition is poor, it is more reliable to completely strip the paint film and repaint from the substrate. Please utilize the materials summarizing the management standards for repair painting and interlayer adhesion.

  • others

Added to bookmarks

Bookmarks list

Bookmark has been removed

Bookmarks list

You can't add any more bookmarks

By registering as a member, you can increase the number of bookmarks you can save and organize them with labels.

Free membership registration

What are the causes of color mismatch? Three basics of color difference management in painting.

The color does not match the previous lot and adjacent parts. The cause is the film thickness and baking temperature. I will explain a method to manage this with numerical values instead of visual inspection.

Even though they have the same color number, they look different when placed next to the previous lot. It is not the paint, but the film thickness and curing conditions that affect the color. If the film thickness changes by 10 microns, the color difference becomes noticeable to the naked eye. ────────────── ■Cause of Occurrence Colors with low hiding power will show a change in brightness when the film thickness is thin, as the substrate becomes visible. The higher the curing temperature, the more the resin yellowes, and the difference is more pronounced in white shades. ■Truth Color matching done only by visual inspection creates variability among evaluators. When the type of lighting changes, the same painted panel can appear to have a different color. ■Improvement Measures Measure with a color difference meter and set the acceptance criteria numerically. Keep the film thickness within specified ranges and fix the curing temperature and time for each color. Please utilize the materials that summarize color management and film thickness standards.

  • others

Added to bookmarks

Bookmarks list

Bookmark has been removed

Bookmarks list

You can't add any more bookmarks

By registering as a member, you can increase the number of bookmarks you can save and organize them with labels.

Free membership registration

What causes paint to turn white? Humidity management to prevent whitening.

White discoloration that occurs frequently during the rainy season and summer. It is a phenomenon where the paint surface cools and condenses due to the evaporation of the solvent. It can be prevented by selecting the right thinner and managing humidity.

Only black and clear finish strangely turns out cloudy white. Before suspecting the paint lot, please check the humidity for that day. When humidity exceeds 70 percent, the risk of whitening rises sharply. ────────────── ■Cause of Occurrence When the solvent evaporates, the temperature of the paint surface drops, causing moisture in the air to condense. The tiny water droplets that are taken in scatter light and make the surface appear cloudy white. ■Truth Fast-drying thinners cause a greater drop in temperature during evaporation, leading to whitening. Managing humidity and the temperature of the material is more effective than managing temperature alone. ■Improvement Measures On days with high humidity, use 5-10 percent slow-drying thinner or retarders in combination. Keep the humidity in the painting booth below 60 percent and acclimate the materials to room temperature. Please utilize the materials summarizing the thinner selection criteria by season.

  • others

Added to bookmarks

Bookmarks list

Bookmark has been removed

Bookmarks list

You can't add any more bookmarks

By registering as a member, you can increase the number of bookmarks you can save and organize them with labels.

Free membership registration

What causes marks to remain on the paint? Three methods to prevent fixture marks when hanging.

Hanger marks, gripping marks, exposed substrate. By specifying the contact position of the jig and managing conductivity, appearance defects and rework labor can be significantly reduced.

The recurring issue in visual inspections is always the same contact point of the jig. It is not due to the painting conditions, but rather the design of the hanging method. Appearance defects caused by the jig account for 20-30% of rework labor. ────────────── ■ Cause of Occurrence The contact areas of the jig do not receive paint, resulting in exposed substrate and differences in film thickness. When paint builds up at the contact points, conductivity decreases, and the adhesion efficiency of electrostatic painting also drops. ■ Truth There is often a lack of awareness that jigs are consumables. Hangers that are used continuously without being stripped create foreign matter and defects in the next batch. ■ Improvement Measures Fix the contact points to non-functional or hidden surfaces and specify them in the drawings. Determine the stripping cycle of the jig based on usage frequency and conduct regular inspections of conductivity. Please utilize the materials that summarize jig design and appearance standards.

  • others

Added to bookmarks

Bookmarks list

Bookmark has been removed

Bookmarks list

You can't add any more bookmarks

By registering as a member, you can increase the number of bookmarks you can save and organize them with labels.

Free membership registration

What causes the corners to rust first? The pitfalls of edge film thickness.

The flat surface has no issues, but the corners are rusting. The film thickness at the edges drops to less than half of that on the flat surface. We will improve this by requesting a chamfer and adding measurement points.

The surface is clean, but only the edges and the rims of the holes rust first. It's not due to the corrosion resistance of the paint; it's that the film thickness is insufficient in those areas. The film thickness at the edges drops to 30-50 percent of that on the flat surfaces. ────────────── ■Cause of Occurrence The paint escapes from the corners due to surface tension and is pulled toward the flat surfaces. In powder coating, static electricity concentrates at the corners, leading to unstable adhesion. ■Truth The oversight is due to measuring the film thickness only on the flat surfaces. Even if it meets the standards, the corners fall below the corrosion resistance limit. ■Improvement Measures Request a chamfer of R0.5 or more during the design phase to reduce sharp edges. Paint the corners first, then coat the entire surface, and add corners as measurement points for film thickness. Please utilize the document summarizing the film thickness management standards by area.

  • others

Added to bookmarks

Bookmarks list

Bookmark has been removed

Bookmarks list

You can't add any more bookmarks

By registering as a member, you can increase the number of bookmarks you can save and organize them with labels.

Free membership registration

What causes bubbles in the coating? Drying management to prevent defects.

Countless small bubbles that appear after firing. The occurrence of pits caused by trapped solvent can be prevented by adjusting the setting time and heating rate.

After removing from the oven, there are countless small bubbles on the painted surface. Before blaming the paint, please check the time before it was placed in the oven. Many issues arise from a lack of 3 minutes of setting time. ────────────── ■Cause of Occurrence When solvents enter high temperatures before fully evaporating, they vaporize and expand within the paint film. The trapped solvents break through the surface, creating bubble-like holes. ■Truth The combination of thick application and rapid temperature rise is the most dangerous. When the film thickness exceeds 40 microns, the surface hardens before the internal solvents can escape. ■Improvement Measures Ensure a setting time of 5-10 minutes after painting and gradually increase the temperature in the oven. Keep the film thickness below 30 microns in one application, and if necessary, apply in two layers. Please utilize the materials summarizing the management standards for film thickness and curing conditions.

  • others

Added to bookmarks

Bookmarks list

Bookmark has been removed

Bookmarks list

You can't add any more bookmarks

By registering as a member, you can increase the number of bookmarks you can save and organize them with labels.

Free membership registration

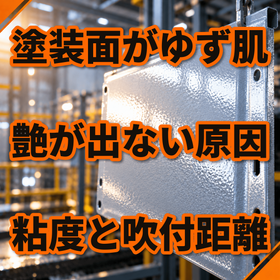
What causes a rough painted surface? Three basics to prevent citrus peel skin.

Yuzu skin undulates like the peel of a mandarin orange. Smoothness is stabilized by three conditions: viscosity, film thickness, and gun distance, along with seasonal thinner selection.

The finish waves like the skin of a mandarin orange. If it reoccurs in the next batch even after polishing, the cause is the painting conditions. The texture of a yuzu skin changes with a 5-second difference in paint viscosity. ────────────── ■ Cause of Occurrence If the paint's flow time is insufficient, fine unevenness remains during curing. This often occurs when there is insufficient dilution, inadequate film thickness, or if the spray gun distance is too far. ■ Truth As the temperature rises, the evaporation of the thinner accelerates, and even with the same mixture, it does not flow after application. In summer, the same viscosity settings as in winter lead to a sharp increase in yuzu skin texture. ■ Improvement Measures Use slow-drying thinners according to temperature ranges and measure viscosity with a Ford cup each time. Maintaining a gun distance of 20-25 centimeters and a film thickness of 25-35 microns stabilizes smoothness. Please utilize the materials summarizing viscosity management standards by season.

  • others

Added to bookmarks

Bookmarks list

Bookmark has been removed

Bookmarks list

You can't add any more bookmarks

By registering as a member, you can increase the number of bookmarks you can save and organize them with labels.

Free membership registration

What causes paint to repel? Three key points not to overlook regarding repelling defects.

A paint defect that causes a round dent due to paint escaping. The root cause is not degreasing, but the oil content in the airline. This explains the key points of pretreatment and equipment management.

The moment the paint is applied, it escapes and creates a round dent. If changing the paint doesn't fix it, the cause lies with the materials and equipment. Eighty percent of the sources of paint beading are oil and silicone. ────────────── ■ Causes of Occurrence If oil or silicone remains on the painted surface, the surface tension changes in that area. The paint cannot spread and results in circular dents with a diameter of 1-3 millimeters. ■ The Truth The real culprit is not the degreasing process but the airline. Oil contained in the compressor's drain adheres to the parts just before painting. Silicone-based release agents and hand creams can also be sources of contamination. ■ Improvement Measures Implement a two-stage air filter and perform daily drain discharge. Manage the oil concentration of the degreasing solution and prohibit handling with bare hands. Please utilize the materials summarizing the standards for pretreatment and equipment management.

  • others

Added to bookmarks

Bookmarks list

Bookmark has been removed

Bookmarks list

You can't add any more bookmarks

By registering as a member, you can increase the number of bookmarks you can save and organize them with labels.

Free membership registration

Thickness of the film and substrate management to prevent chipping of stainless steel.

Chipping caused by flying stones and other factors. This explains measures against insufficient film thickness and poor adhesion.

Chipping of the paint film occurs due to flying stones while driving. Chipping is a defect related to both film thickness and adhesion strength. ────────────── ■ Cause of Occurrence Chipping is a defect where the paint film partially peels off due to impact. If there is insufficient film thickness or poor adhesion to the substrate, resistance to impact decreases. ■ Truth Stainless steel has difficulty achieving adhesion due to the influence of the passive film, and in the case of thin films, it becomes particularly vulnerable to impact. If the substrate treatment is inadequate, this tendency is exacerbated. ■ Improvement Measures Ensure proper film thickness and avoid extreme thin films. Increase adhesion strength with blast treatment and specialized primers. Utilize documents that enhance impact resistance specifications.

  • others

Added to bookmarks

Bookmarks list

Bookmark has been removed

Bookmarks list

You can't add any more bookmarks

By registering as a member, you can increase the number of bookmarks you can save and organize them with labels.

Free membership registration

Why does poor curing occur in stainless steel coatings? Basics of baking conditions.

The painted surface is sticky due to insufficient curing. The cause is a lack of control over the baking temperature and time.

Although it should have been painted, the surface is sticky. Poor curing is a defect that is not easily noticeable visually. ────────────── ■ Cause of Occurrence Poor curing is a phenomenon where the paint film does not cure sufficiently due to low baking temperature or short baking time. Stainless steel has low thermal conductivity, making it difficult for heat to penetrate to the interior. ■ The Truth Even if the set temperature in the oven is correct, it takes time for heat to reach the interior of the material. If the time is shortened, only the surface will be cured. ■ Improvement Measures Adjust the baking time according to the thickness of the material. Regularly measure the temperature in the oven and check for discrepancies with the management values. Utilize materials that provide guidelines for baking conditions.

  • others

Added to bookmarks

Bookmarks list

Bookmark has been removed

Bookmarks list

You can't add any more bookmarks

By registering as a member, you can increase the number of bookmarks you can save and organize them with labels.

Free membership registration

Chemical treatment and film thickness management to prevent the recurrence of rust on stainless steel.

Even stainless steel, which is supposed to be rust-resistant, can develop rust again. This explains measures against rust transfer and insufficient film thickness.

Rust has appeared on stainless steel that is supposed to be "rust-free." If it recurs even after painting, there is another cause. ────────────── ■ Cause of Occurrence The recurrence of rust on stainless steel is mainly due to "rust transfer" from iron powder that adhered during processing. Insufficient coating thickness can also contribute to the recurrence of rust. ■ Truth Fine iron powder from tools used in polishing or cutting can adhere to the surface, leading to rust formation. If the coating is thin, it cannot suppress this rust. ■ Improvement Measures Please remove the iron powder through acid cleaning or passivation treatment. It is also important to stabilize the coating thickness at 8-15 microns. Utilize materials that explain the methods for pre-treatment and coating thickness management.

  • others

Added to bookmarks

Bookmarks list

Bookmark has been removed

Bookmarks list

You can't add any more bookmarks

By registering as a member, you can increase the number of bookmarks you can save and organize them with labels.

Free membership registration

Why does uneven gloss occur in stainless steel paint? Reviewing drying conditions.

Variations in gloss that appear different in certain areas. This is caused by fluctuations in drying temperature and wind speed.

Even though it is the same product, it appears to have different levels of gloss in certain areas. Gloss unevenness is a visual defect that detracts from the sense of luxury. ────────────── ■Cause of Occurrence Gloss unevenness occurs due to variations in drying temperature and wind speed during the curing process, which leads to differences in the hardening speed of the coating. Variations in film thickness also affect the appearance of gloss. ■Truth If the airflow inside the curing oven is not uniform, the drying speed will vary by area, resulting in differences in gloss. Since stainless steel is a material that easily shows gloss, even slight differences become more noticeable. ■Improvement Measures Regularly check the wind speed and temperature distribution inside the curing oven. Standardize spray conditions to minimize variations in film thickness. Please utilize materials that clarify the management points for gloss unevenness.

  • others

Added to bookmarks

Bookmarks list

Bookmark has been removed

Bookmarks list

You can't add any more bookmarks

By registering as a member, you can increase the number of bookmarks you can save and organize them with labels.

Free membership registration

Three on-site checks to prevent foreign matter contamination in stainless steel.

Defects on the painted surface directly lead to complaints. We will explain the key points of on-site management to prevent foreign matter contamination.

There are small bumps on the painted surface. Contamination that directly leads to customer complaints originates from the worksite. ────────────── ■ Cause of Occurrence Contamination occurs when dust or grinding powder in the work environment adheres to the paint film. Stainless steel often involves a grinding process, making it prone to metal powder contamination. ■ Truth If the cleanliness of the painting booth is not maintained, airborne dust will adhere directly to the paint film. Dust adhesion due to static electricity is also a commonly overlooked cause. ■ Improvement Measures Thoroughly manage the filters and cleaning frequency of the painting booth. Separating the workflow of the grinding and painting processes is also effective. Please utilize materials that clarify the checklist for site management.

  • others

Added to bookmarks

Bookmarks list

Bookmark has been removed

Bookmarks list

You can't add any more bookmarks

By registering as a member, you can increase the number of bookmarks you can save and organize them with labels.

Free membership registration

Key points for temperature and film thickness management to prevent color unevenness in stainless steel.

Color unevenness that appears different despite being the same paint. It is caused by variations in temperature distribution and film thickness.

Even though the same paint is used, the colors appear different. Color unevenness is not always caused by the paint itself. ────────────── ■ Causes Color unevenness occurs due to variations in baking temperature and uneven film thickness, which lead to differences in color development. Stainless steel is a material that tends to show color unevenness because the reflection of light changes depending on the direction of the hairline finish. ■ The Truth When there are temperature differences inside the baking oven, even within the same lot, the curing state can vary by area, resulting in changes in color development. Variations in film thickness also affect how the color appears. ■ Improvement Measures Regularly measure and manage the temperature distribution inside the baking oven. Standardize spray conditions to maintain uniform film thickness. Please utilize materials that explain the methods for managing temperature and film thickness.

  • others

Added to bookmarks

Bookmarks list

Bookmark has been removed

Bookmarks list

You can't add any more bookmarks

By registering as a member, you can increase the number of bookmarks you can save and organize them with labels.

Free membership registration

Why does stainless steel coating run? The relationship between viscosity and film thickness.

The defect is not necessarily due to the operator's mistake. We will explain the points for reviewing viscosity management and film thickness settings.

Vertical stripes of drips appear on the painted surface. Are you attributing it to "the worker's skill"? ────────────── ■Cause of Occurrence Drips occur when the paint viscosity is too low or when too much paint is applied at once. Stainless steel is a material with a smooth surface that allows paint to flow easily. ■Truth The viscosity of the paint changes with temperature and humidity. If you work without managing the viscosity consistently, the rate of drip occurrence will vary with the seasons. ■Improvement Measures Manage the dilution ratio numerically and maintain a consistent viscosity. Keep the film thickness per application low and paint in multiple passes. Please utilize materials that explain how to manage viscosity and film thickness.

  • others

Added to bookmarks

Bookmarks list

Bookmark has been removed

Bookmarks list

You can't add any more bookmarks

By registering as a member, you can increase the number of bookmarks you can save and organize them with labels.

Free membership registration

Why do stainless steel blisters occur? Basics of moisture management.

Blistering of the coating is caused by moisture and oil. We will explain the specific precautions and measures for stainless steel.

Blisters in the paint film after coating. They often occur months later, making the cause difficult to identify. ────────────── ■ Cause of Occurrence Blisters are a phenomenon where moisture or oil trapped within the paint film expands due to heat or humidity, pushing the film up. Insufficient degreasing and drying are the main causes. ■ The Truth Stainless steel has low thermal conductivity, and if the drying time is insufficient, the surface may dry while moisture remains inside. This residual moisture expands later, manifesting as defects. ■ Improvement Measures Ensure sufficient temperature and time during the drying process. It is also important to reliably remove oil during the degreasing process. Please utilize materials that allow you to review drying conditions.

  • others

Added to bookmarks

Bookmarks list

Bookmark has been removed

Bookmarks list

You can't add any more bookmarks

By registering as a member, you can increase the number of bookmarks you can save and organize them with labels.

Free membership registration
Prev 12345...7 Next
  • 金属・化学・窯業・食品・医薬品などのほぐし・解砕・ふるい分けがこれ一台 解砕機構付き佐藤式振動ふるい機 つばさ デモ実施中!
  • 竹中直人と対談しませんか? 出演企業募集中!
    • Contact this company

      Inquiry Form
    • Before making an inquiry

      Download Profile

    Products

    • Search for Products

    Company

    • Search for Companies

    Special Features

    • Special Features

    Ranking

    • Overall Products Ranking
    • Overall Company Ranking

    support

    • site map
    IPROS
    • privacy policy Regarding external transmission of information
    • terms of service
    • About Us
    • Careers
    • Advertising
    IPROS Services
    • >IPROS GMS | Search site for the manufacturing industry
    • >IPROS | Search site for the B2B industry
    COPYRIGHT © 2001-2026 IPROS CORPORATION ALL RIGHTS RESERVED.
    Please note that the English text on this page is automatically translated and may contain inaccuracies.